This woodworking project is about how to build a rabbit hutch step by step. Building a wooden rabbit hutch for your garden is a quick project that will protect your pets from bad weather. Choose a simple design especially if you don’t have an extensive expertise in the field. Take accurate measurements before cutting the components at the right size, otherwise they won’t fit together properly.
There are a few aspects regarding the wooden construction that you have to pay attention to, before starting the project. Therefore, we recommend you to adjust the size of the rabbit hutch to your needs and to use weather resistant lumber. After assembling the small hutch, we recommend you to place it on a dry location, in order to protect it from water damage.
It is essential to work with attention and to fit the door into the opening in a professional manner. Align the door and lock it to the frame with metal hinges and using a basic latch. Attaching the roof is one of the most important step of the project, so make sure the install it in a professional manner. The shingles should overhang the roof at least 1″ on all sides of the roof. See all my Premium Plans in the Shop.
Made from this plan
Building a rabbit hutch

Building a rabbit hutch
Materials
- A – 4 pieces of 1×3 lumber – 24”, 4 pieces – 36″, 8 pieces – 15″ FRAME
- B – 4 pieces of 1×3 lumber – 18 3/4”, 2 pieces – 34 1/2″, 2 pieces – 22 1/2″ FRAME
- C – 1 pieces of 3/4″ plywood – 24″ x 34 1/2″ long FLOOR
- D – 6 pieces of 1×3 lumber – 15″, 8 pieces – 14 1/4″, 4 pieces – 24″ FRAME
- D – 16 pieces of 1×3 lumber – 10″ long FRAME
- E – 2 pieces of 1×2 lumber – 14″ long, 10 pieces – 7″ DOOR
- F – 2 piece of 1×3 lumber – 24″ long, 1 piece of 3/4″ plywood – 10″ x 17 1/2″ WALL
- G – 2 pieces of 1×3 lumber – 36″ long, 3 pieces – 24″ ROOF
- G – 1 pieces of 3/4″ plywood – 26″ x 38″, 10 sq ft of asphalt shingles ROOF
Tools
- Safety gloves, glasses
- Miter saw, jigsaw
- Chalk line, tape measure, spirit level, carpentry pencil
- Drill machinery and drill bits
Tips
- Apply several coats of wood stain to the wooden components
- Fill the holes with wood filler and smooth the surface
- Plumb the sides of the bench with a spirit level
Time
- One Day
Related
How to build a rabbit hutch step by step

Building the frame of the enclosure
The first step of the woodworking project is to build the frame of the bottom enclosure. As you can see in the plans, we recommend you to make the frame using 1×1 lumber. Check if the corners are right-angled and use a spirit level to make sure the vertical components are plumb.

Building the bottom enclosure
Next, attach the 1×3 slats to the exterior of the frame, as in the image. Furthermore, drill pocket holes at both ends of the slats and insert the galvanized screws, if you want to get a professional result. Fit chicken wire to cover the openings.

Installing the top of the bottom enclosure
Afterwards, cut a piece of 3/4″ plywood at the right size and lock it to the top of the enclosure. Build the ladder from a small piece of plywood and fit it in the opening, as in the diagram.

Building the frame of the rabbit hutch
Building the actual rabbit hutch is a straight-forward project, but you need to use detailed plans and quality materials. Cut the components at the right size and lock them together with pocket screws. Check if the corners are right-angled and add waterproof glue to the joints.

Installing the splitting wall
Next, install the interior wall using the information from the diagram. Assemble the wall and lock it inside the frame by using the information shown in the plans. Work with attention and with great care, if you want to get a professional result.

Building the door
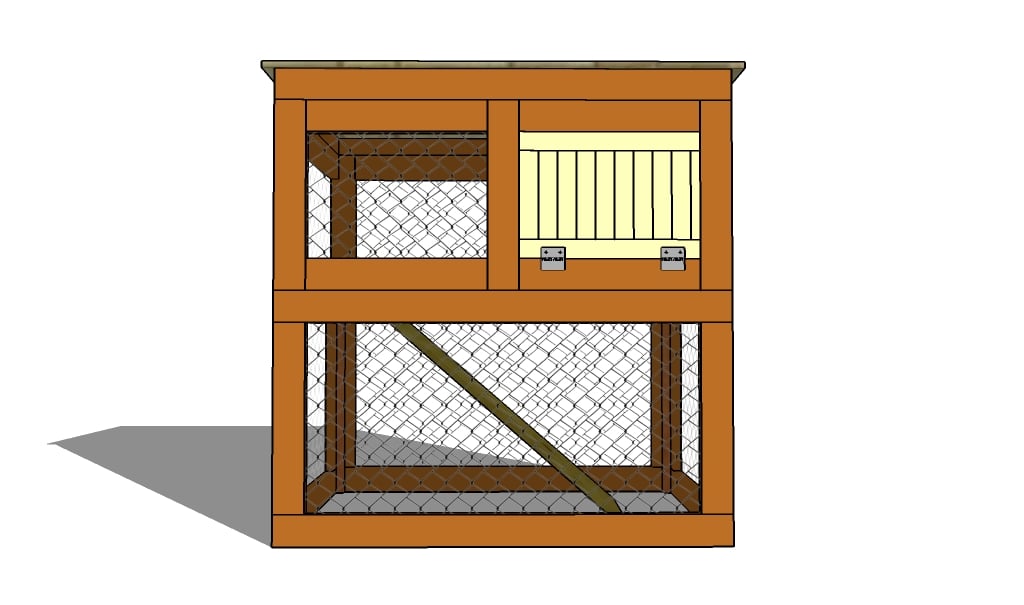
Build the door of the rabbit hutch using 1×2 lumber, as in the image. Fit the door inside the opening and lock it to the frame with metal hinges. Check if the door opens properly and install a latch to lock the door properly.

Attaching the rafters
The next step of the project is to build the rafters and to lock them to the frame of the hutch. As you can notice in the image, you need to cut the rafters at 88 degrees, by using a circular saw with a sharp blade. Make proper marks on the components before making the cuts. Align all the components at both ends and lock them to the top of the hutch with screws.

Building the roof of the hutch
Attach a piece of 3/4″ plywood over the roof and cover it with tar paper. Afterwards, install asphalt shingles over the roof starting with the bottom and lock them into place with galvanized staples. Make sure the shingles overhang the roof for about 1″ on all the edges of the roof, in order to enhance the water drainage.
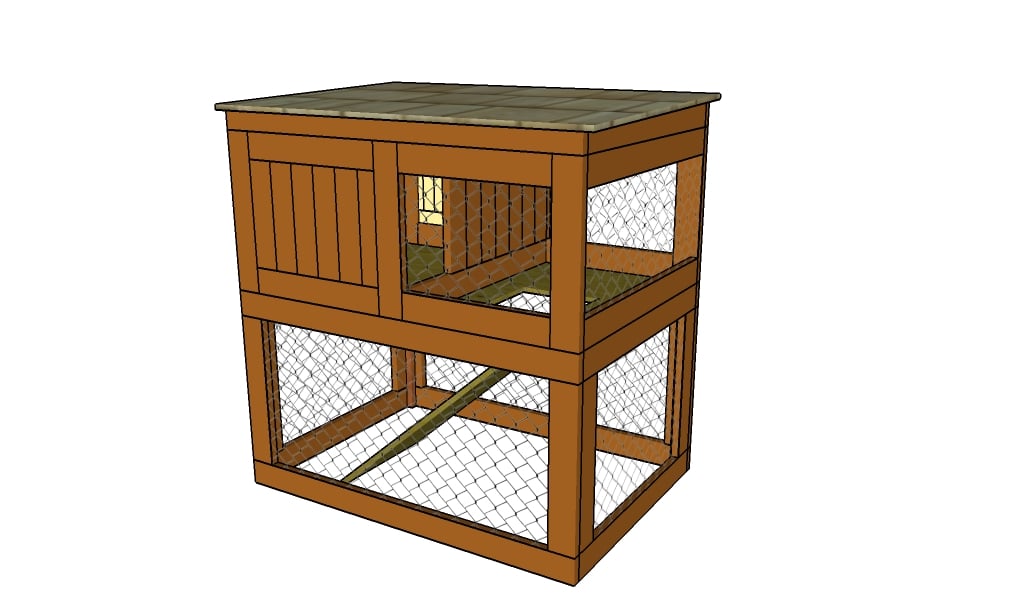
DIY rabbit hutch
Once assembled, the rabbit house has a nice appearance.
How to build a rabbit hutch
The rabbit hutch seen from behind has a modern design. The lean to roof will drain the water properly.

How to build a rabbit hutch
Last but not least, you should take care of the finishing touches. Therefore, assemble the rabbit hutch and move it to the final location. Check if the structure is rigid and make sure the screws are properly inserted.

Thank you for reading our project about how to build a rabbit hutch and we recommend you to check out the rest of the projects. Don’t forget to LIKE and SHARE our projects with your friends, by using the social media widgets. SUBSCRIBE to be the first that gets our latest projects.
5 comments
How much does the material for the whole hutch cost?
You have the materials list, so you can add up the costs and make an accurate estimate.
How many rabbits is this suitable for?
I don’t know. If there are any rabbit experts reading, please leave a comment.
So this is kinda a useless step by step. It doesnt not even have the chicken wire/hardware cloth listed in materials. So how am I going to be able to gather all my materials if I dont have a complete.list