This article is about how to install mineral wool in attic or between the ceiling studs. This type of isolation is very efficient both summer, when it keeps the cool air inside rooms and during winter, when it reduces heating costs. The process of installing mineral wool insulation is not very complex nor time-consuming, so even a diy-er can get the job done. This product is a very good heat insulator and sound absorber, so it is used on a large scale. In addition the benefit-cost ratio is very good as compared to other materials.
The biggest drawback of mineral wool is represented by safety consideration, as it can irritate the eyes, skin and the respiratory system. Mineral wool comes in different forms and dimensions: 2’x4′ (50 cm x 1 m) strips, batts (2″ X 16″ X 48″ 32 panels, 3″ X 16″ X 48″ 24 panels) and so on. You should choose the products, whose dimensions are the closest to your needs (measure the distance between the studs and the studs thickness).
Installing mineral woolor fiber glass insulation might look as a complex or costly project, but we can say from our experience, that the investment will pay off in a couple of years as the heating cost will decrease significantly. You could start by insulating your ceiling by fitting mineral wool bats between the wood studs. Afterwards, you could also try to insulate your attic by installing the mineral wool between the sloped ceiling.
Generally speaking, there are four types of insulation: rolls and batts, loose-fill, rigid foam and foam in place. Rolls and batts are flexible (mineral wool, fiberglass), loose-fill are fibers that are blown between the studs, rigid foam is the most efficient insulator but is more expensive than fiberglass, while foam in place (such as polyurethane foam) is used to insulate door, windows and other small areas .
You can choose from many types of mineral wool, as it comes in the form of batts or rolls and in more thicknesses. We recommend you to buy the mineral wool according to your needs (measure the thickness of the wood studs and the space between them), but you have to remember that the greater the thickness the higher the R-value (thermal resistance). Therefore, if you double the thickness of mineral wool batting (by installing two layers) you also improve the thermal resistance. In addition, if you install drywall over the wood stud frame, you will slightly increase the R-value.
Materials
- Mineral wool
- Wire
- Nails
Tools
- Safety gloves and glasses, respiratory mask
- Carpenter pencil, tape measure
- Scissors and exacto knife
- Hammer, ladder
Tips
- Avoid as much as possible the contact with the mineral wool
- Use safety glasses, gloves and a respiratory mask
My best tips on installing mineral wool to a ceiling:
Mineral wool insulation, also known as rock wool or stone wool, is a great choice for insulating ceilings. It’s fire-resistant, excellent at soundproofing, and easy to work with. Whether you’re insulating a basement ceiling or upgrading an attic, these tips will help you install mineral wool safely and effectively.
1. Gather Your Tools and Materials
Before you get started, make sure you have the necessary tools and materials:
- Mineral wool batts or rolls
- Protective gear (gloves, long sleeves, goggles, and a dust mask)
- Utility knife (for cutting insulation)
- Measuring tape
- Staple gun or insulation hangers
- Ladder or scaffolding (depending on ceiling height)
- Staples, screws, or insulation fixings
2. Measure and Plan the Layout
Measure the dimensions of your ceiling area and plan how you’ll fit the mineral wool batts or rolls between the joists. Mineral wool typically comes in standard sizes, but it’s important to cut the pieces to fit snugly between ceiling joists to avoid gaps that could reduce insulation efficiency.
3. Wear Protective Gear
Mineral wool is made from fibers that can irritate your skin, eyes, and lungs, so it’s essential to wear protective clothing, gloves, goggles, and a dust mask. Long sleeves and pants will help keep your skin covered while working.
4. Cut Mineral Wool to Size
Use a sharp utility knife to cut the mineral wool to fit the spaces between your ceiling joists. A straight edge or insulation knife can help you make clean, straight cuts. Be sure the pieces are slightly larger than the gaps between the joists, as this will ensure a snug, friction fit.
5. Install Between the Joists
Starting in one corner, press the mineral wool batts into place between the ceiling joists. Mineral wool should fit tightly and hold itself in place through friction, but for extra security, you can use insulation hangers or staples to keep the batts in place. If using staples, be sure to staple the insulation to the joists, not the batts themselves.
6. Avoid Compression
When installing the mineral wool, avoid compressing it. Mineral wool works by trapping air between its fibers, and compressing it can reduce its insulating properties. Make sure it sits flush with the joists without being squashed.
7. Seal Gaps and Voids
For optimal insulation performance, ensure there are no gaps or voids between the batts and the joists. If you encounter small gaps or spaces around obstacles, use offcuts of mineral wool to fill them in. This ensures that the ceiling is uniformly insulated, preventing heat loss or sound leakage.
8. Install a Vapor Barrier (if needed)
In some installations, especially where moisture is a concern, a vapor barrier may be necessary to prevent moisture from getting into the insulation. Check local building codes to see if a vapor barrier is required for your project. If so, install a vapor barrier sheet over the insulation before finishing the ceiling with drywall or another covering.
9. Check for Obstacles
If there are any pipes, electrical wires, or vents running through the ceiling, be mindful when cutting and fitting the mineral wool. Cut the insulation carefully around these obstacles, and be cautious not to cover or damage any wiring or ductwork.
10. Finish the Ceiling
Once the mineral wool is installed and secure, you can finish the ceiling with drywall, plywood, or another material of your choice. This will protect the insulation and complete the look of your ceiling.
Bonus Tip: Clean Up Thoroughly After installing mineral wool, there may be loose fibers or dust left over. Be sure to clean up thoroughly using a vacuum cleaner to prevent fibers from lingering in the air.
How to install mineral wool between studs

Mineral wool rolls
In order to insulate our ceiling, we have used both fiberglass rolls and pre-cut batts. The mineral wool rolls we bought, were about 50 feet, but the rolls can have up to 100 feet. In addition, they might be faced or unfaced.
In order to fill the space between the wood studs, you have to cut the rolls to the needed length, by using a sharp utility knife and a straight edge.

Mineral wool batts
We also used mineral 4” thick wool batts to insulate the ceiling. The batts come in different lengths and widths, therefore you should buy the product which requires the least amount of cuts.
Batt insulation is available with and without facing. We recommend you to buy faced fatts, as they will be easier to install and because the paper layer has the role of an anti-vapor barrier. If you buy batts without facing, you’ll have to attach a plastic foil.

How to install mineral wool between studs
Before installing the mineral wool insulation, you have to measure the thickness of the wood studs and the distance between them. In our case the space between the wood studs is about 24” on center, just enough to fit 23” wide mineral wool bats. Nevertheless, you should use 15” wide insulation when the studs are 16” spaced.
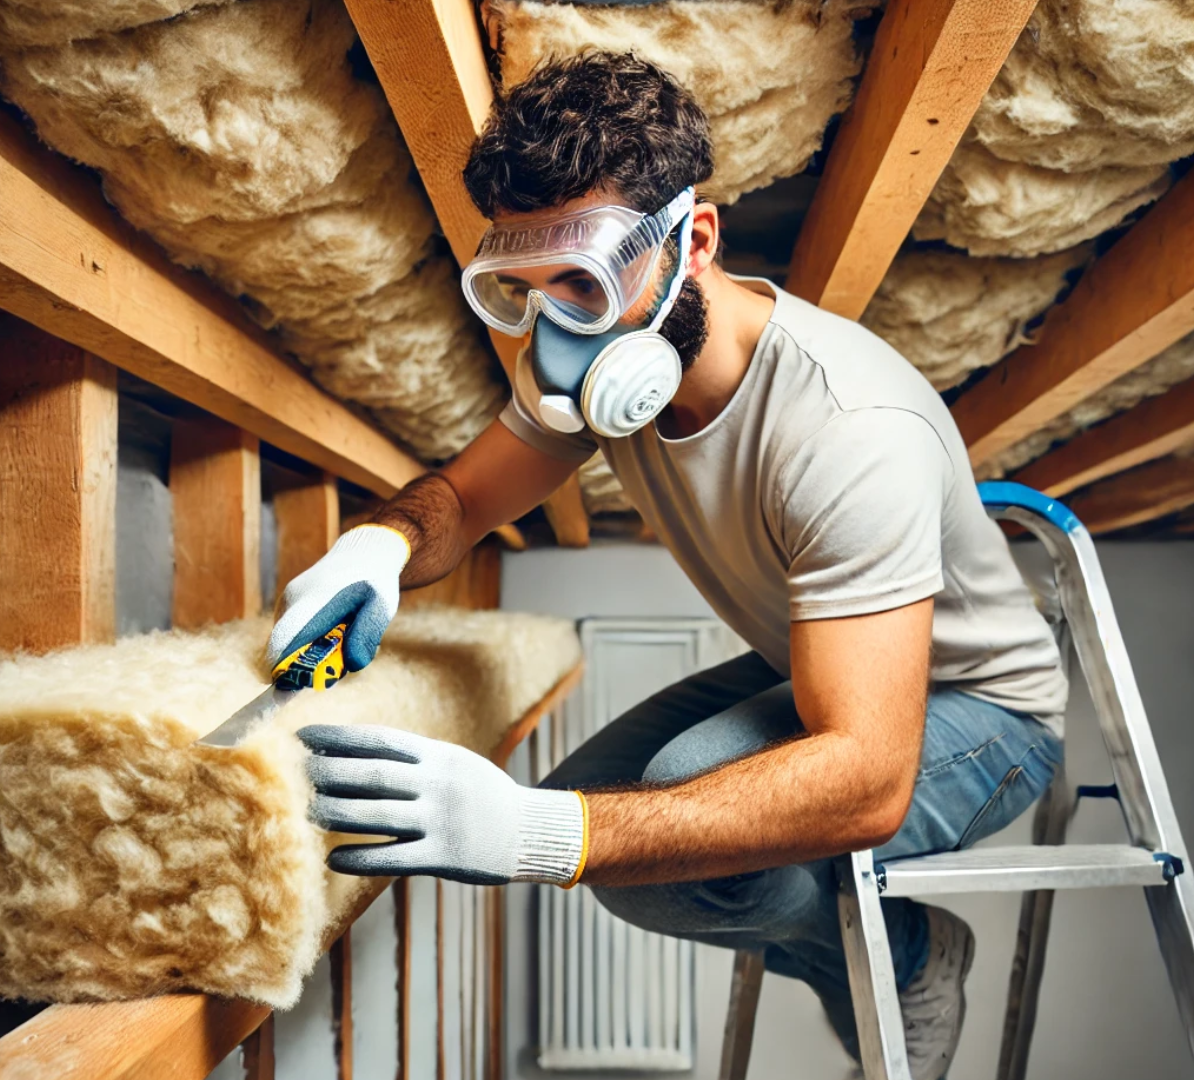
How to cut mineral wool
You have to cut the mineral wool batts or rolls to fit them into place, in a professional manner. Therefore, you have to use a tape measure to calculate the needed length at which you have to make the cut. Next, use the tape measure to set the cut line and place a large piece of plywood under the mineral wool (to protect the floor).
Last but not least, cut the mineral wool with a sharp utility knife, by using an aluminum straight edge. Remember that you have to wear a respiratory mask while you work with mineral wool, as the fibers are very toxic.
Installing mineral wool insulation

Installing mineral wool insulation
Start installing the mineral wool from one corner of the room. If the batts are faced, then you have to staple through their flanges to the inside of the wood joists. If you use unfaced batts or rolls, the friction will hold them into place.

Securing mineral wool with wire
Nevertheless, you can secure the mineral wool layer with wire, as you can see in the image. The process is straightforward: use a hammer and install several nails in the wood studs and then using the wire make a network, as to support the mineral wool. The pattern shouldn’t be geometrically perfect, but should be dense enough to support properly the boards of mineral wool.
If you have to install drywall directly to the wood joists, we recommend you not to secure the batts with wire, otherwise you won’t be able to hand the boards level.

Installing the second layer of insulation
The next step is to install a second layer of mineral wool, as to fill in the gap between the metal studs and the future drywall ceiling. In addition, as we have previously mentioned, the second layer will also improve the thermal and acoustical insulation.
In order to fix the mineral wool strips, we have proceed exactly in the same way, as in the previous steps. Make sure you cut properly the mineral wool, as not to leave any gaps between the boards or layers. Any gap would affect the efficiency of the insulation.

Installing double adhesive tape
After we have finished installing the second layer of mineral wool on the whole surface, we decided to fix an anti-vapor and moisture barrier, as we have used unfaced batts.
Consequently, we started by installing a double adhesive tape on the metal track, all around the room’s perimeter. This is a the proper method to attach the polyethylene foil, as it prevents air moisture and vapors to form.

Installing polyethylene vapor barrier
Next, measure the surface of the room and cut the plastic foil to that specific dimensions, using an utility knife. Start with one corner of the ceiling and attach the anti vapor foil to the ceiling joists. If you do not want to use double adhesive tape, you could just staple it along the walls every 5” / 15 cm.
Afterwards, continue fastening the foil, until you got to the other wall. Remember that you have to make cuts if necessarily (using the utility knife) around light wires, ventilation pipes or attic ladders.
By following these tips, you’ll be able to install mineral wool insulation in your ceiling effectively, improving your home’s energy efficiency, soundproofing, and fire resistance. It’s a manageable DIY project that offers lasting benefits.
Thank you for reading our article about how to install mineral wool and we recommend you to check out the rest of our projects. Don’t forget to Like and SHARE our projects with your friends, by using the social media widgets.