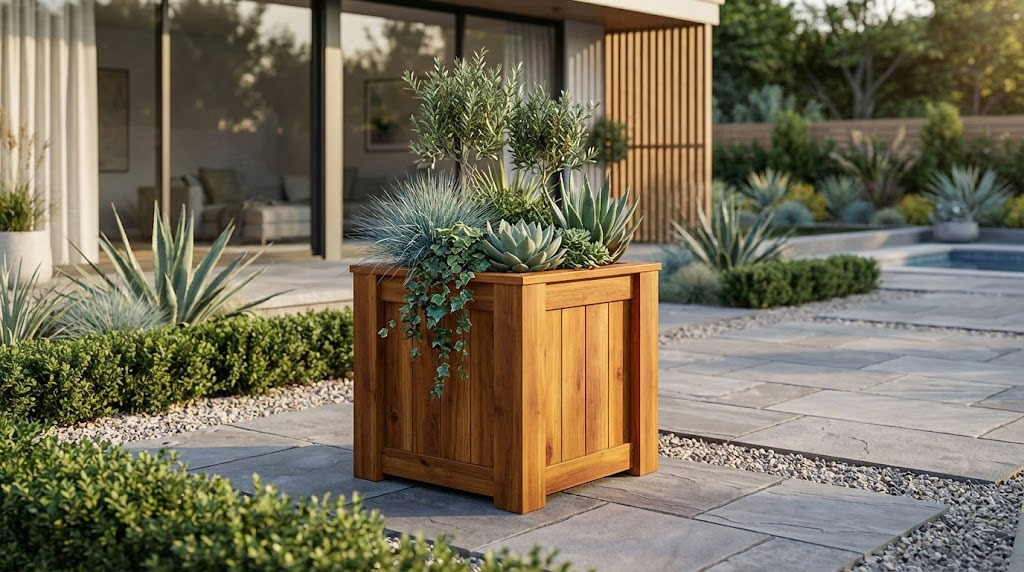
This step by step diy woodworking project is about square planter box plans. If you want to learn more about building a beautiful wooden planter box for your front porch or backyard patio, we suggest you to take a close look over the instructions described in the article. There are many designs to choose from when building a planter, so take a look over the rest of the projects.
Before starting the actual construction project, we recommend you to plan everything, as to save money and to keep the costs under control. Adjust the size and the design of the garden planter to suit your needs. In addition, we recommend you to invest in high-quality materials, such as pine, redwood or cedar, as they have a nice finish and are highly durable, especially in a humid environment.
It is essential to invest in high quality materials, that are also water-resistant, such as pressure-treated lumber. Cut the components at the right size by using a circular saw and smooth the cut edges with a sand block. Don’t forget to ask a skilled friend to assist you during the project, especially if you don’t have a large expertise in the field. You need someone to hold the components into place, while you drive the screws in.
Made from this plan
Square planter box plans

Building a wood planter box
Materials
- A – 4 pieces of 4×4 lumber – 17″ long LEGS
- B – 4 pieces of 3/4″ plywood – 17″x23″ long PANELS
- C – 8 pieces of 2×4 lumber – 17″ long SUPPORTS
- D – 16 pieces of 2×4 lumber – 16″ long TRIMS
- E – 2 piece of 2×2 lumber – 17″ long, 3 piece of 1×6 lumber – 16 1/2″ long BOTTOM
- F – 4 piece of 1×4 lumber – 24″ long TRIMS
- 1 piece of 4×4 lumber – 8 ft
- 1 piece of 3/4″ plywood – 4’x4′
- 5 pieces of 2×4 lumber – 8 ft
- 1 piece of 2×2 lumber – 4 ft
- 1 piece of 1×6 lumber – 6 ft
- 1 piece of 1×4 lumber – 8 ft
- 2 1/2″ screws
- 1 1/4″ screws
- filler, glue, stain
Tools
- Safety gloves, glasses
- Miter saw, jigsaw
- Chalk line, tape measure, spirit level, carpentry pencil
- Drill machinery and drill bits
Tips
- Use a good miter saw to make the angle cuts
- Drill pilot holes before inserting the screws
Time
- One Week
Related
How to build a wood planter box

Building the side panels
First of all, you need to build the four panels for the planter. Mark the cut lines on the 3/4″ plywood sheets and get the job done with a circular saw. Smooth the edges with fine-grit sandpaper and remove the residues with a damp cloth.
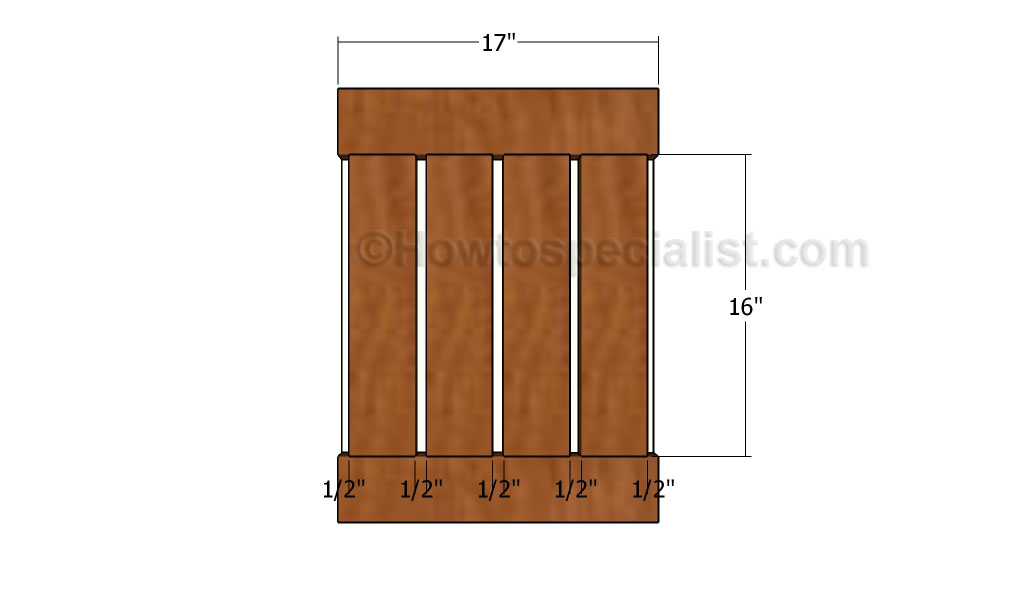
Fitting the side trims
Afterwards, we recommend you to fit the 2×4 trims to the panels. Drill pocket holes at both ends of the vertical trims and secure them to the top and bottom supports using 2 1/2″ screws. Add glue to the joints and leave no gaps between the components.
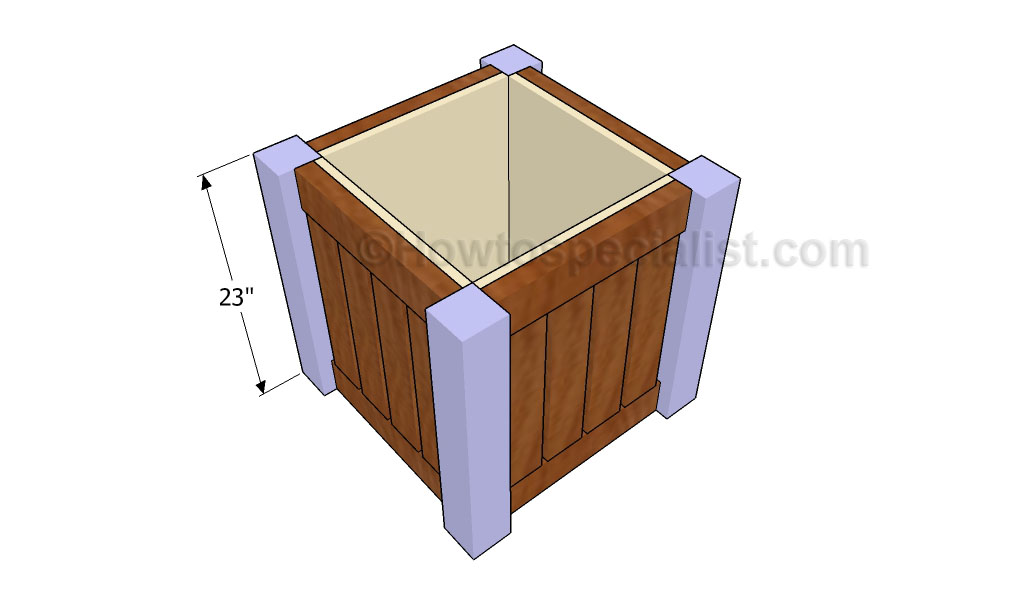
Assembling the planter
After building the four panels, we recommend you to secure them to the corner legs. Drill pocket holes at both ends of the horizontal supports and secure them to the posts using 2 1/2″ screws. Add glue to the joints and make sure there are no gaps between the components.
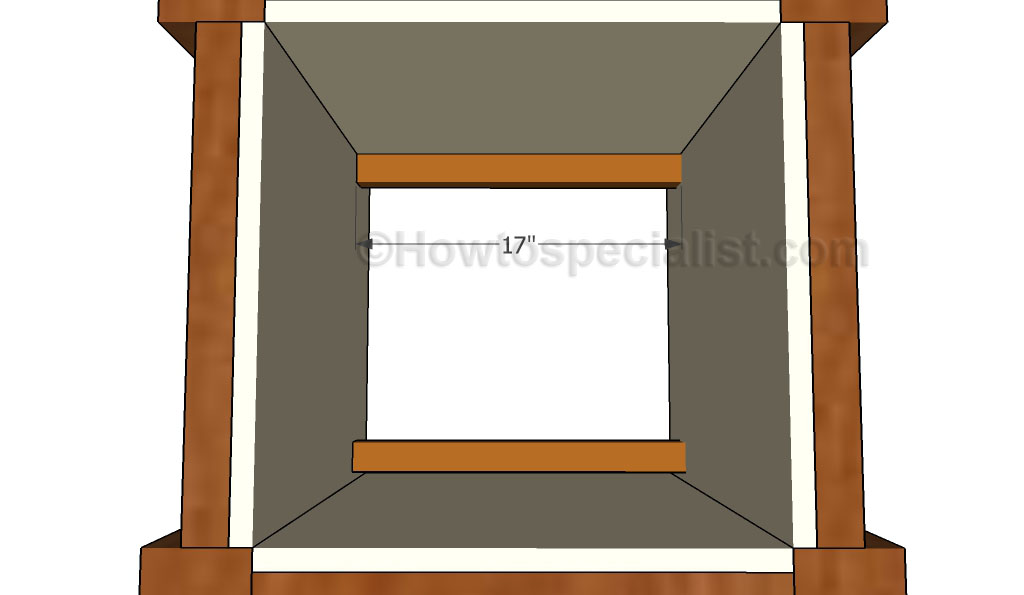
Fitting the cleats
Next, fit the 2×2 cleats to the interior of the planter. Drill pilot holes through the cleats and insert 2 1/2″ screws into the planter. Align the edges with great care and leave no gaps between the components.
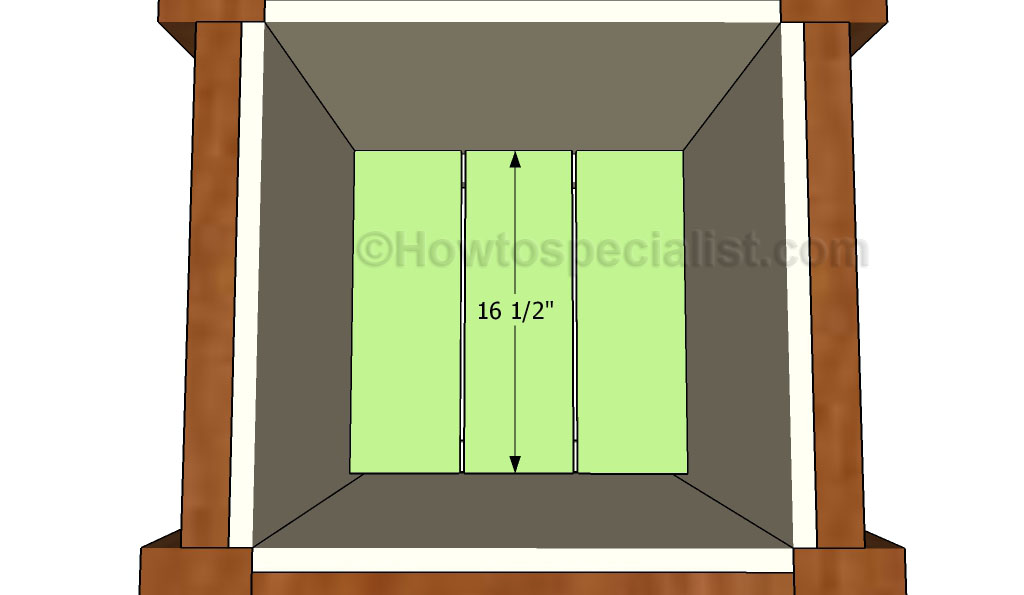
Fitting the bottom slats
Fit three 1×6 slats to the cleats, as described in the diagonal. If you want to fill the planter with soil, we recommend you to build the floor out of 3/4″ plywood. Cut the component at 16 1/2″ x 17″ and secure it to the cleats using 1 1/4″ screws.
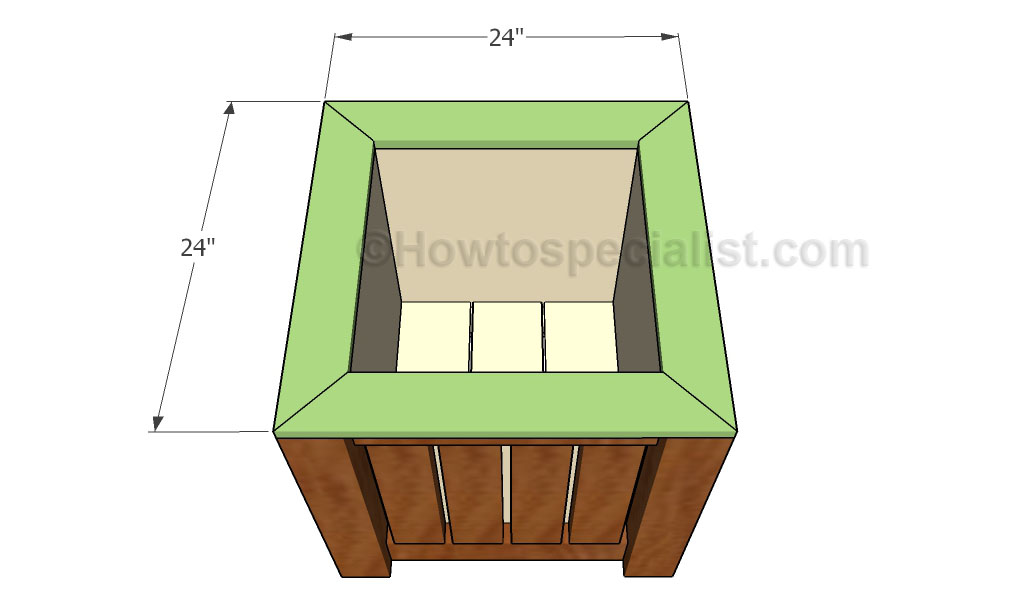
Fitting the top trims
One of the last steps of the woodworking project is to install the top trims to the square planter. Cut the trims out of 1×4 lumber. Cut both ends of the trims at 45 degrees and secure them to the planter using finishing nails. Add glue to the joints and leave no gaps between the components.
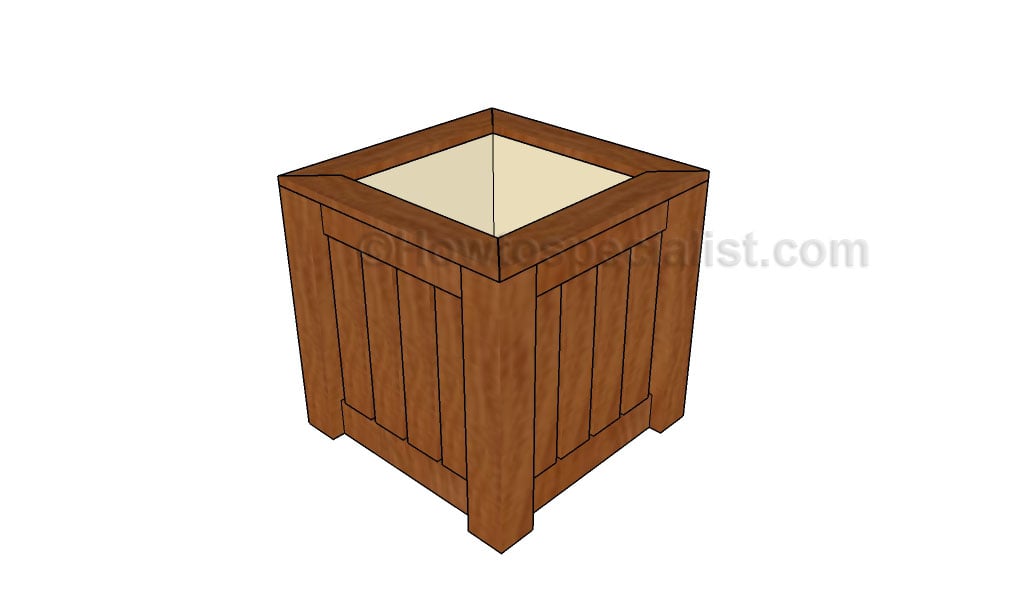
Square planter plans
Last but not least, we recommend you to take care of the finishing touches. Fill the holes with wood filler and let it to dry out for several hours. Check out the rest of the woodworking projects, to see more ways to improve the look of your garden.
Thank you for reading our project about square planter plans and we recommend you to check out the rest of the projects. Don’t forget to share our projects with your friends and LIKE us, by using the social media widgets. SUBSCRIBE if you want to be the first that gets our latest articles.