This diy step by step article article is about garden shed plans free. Building a light construction in your backyard to store your woodworking and garden tools, as well as other objects you don’t use on the regular basis is a great idea, but you need to understand the implications of this project. After you select a proper location for the garden shed, you have to build several concrete footings, construct the floor, the walls and the roof of the wooden structure. Afterwards, you have to install the asphalt shingles and fit the door and windows, to get your shed ready for use.
Choosing the right place for the garden shed is a real challenge, as you have to both comply with the local regulations and choose a location that won’t affect the look of your backyard. From a technical point of view, the soil should drain water properly, otherwise the foundation of your construction might be affected on the long run. In addition, you should place the shed in such a way that it would allow you to store the garden tools close the areas where you grow your vegetables and flowers.
Generally speaking, garden sheds come in a large variety of shapes, sizes and designs, but you have to choose the one that fit your needs and tastes perfectly. When designing the feature shed, you should take several aspects into consideration, such as computing the needed area to store all your tools, the shape of the roof or your budget. From our experience, we consider that the more complex the shape of the shed, the more expenditures would imply your project.
Made from this plan
In order to build a garden shed, you need the following:
Materials
- A – 4 tube forms, 4 adjustable anchors CONCRETE FOOTINGS
- B – 2 pieces of 2×6 lumber, 120” long, 2 pieces of 2×6 lumber – 123” long, 7 pieces of 2×6 lumber – 93” long JOISTS
- C – 80 sq ft of 3/4” tongue and groove plywood FLOORING
- D – 4 pieces of 2×4 lumber, 89” long, 4 pieces of 2×4 lumber 120” long BOTTOM AND TOP PLATE
- E – 2×4 lumber, 90” long WALL STUDS
- F – 2 pieces of 2×4 lumber 3′ long TRIMMER STUDS
- G – 4 pieces of 2×4 lumber, 3′ long DOUBLE HEADER
- H – 500 sq ft of 5/8” grooved plywood EXTERIOR SIDING
- I – 12 pieces of 2×4 lumber, 72” long, 52º cuts at both ends RAFTERS
- J – 6 pieces of 2×4 lumber, 98 1/2” long BOTTOM RAFTERS
- J– 6 pieces of 2×4 lumber 35” long TRUSS MEMBER
- K – 150 sq feet of 1/2” tongue and groove plywood ROOFING SHEETS
- L – 150 sq ft of roofing felt ROOFING UNDERLAYMENT
- M – 150 sq ft of asphalt shingles, 1/2” roofing nails ASPHALT SHINGLES
- N – 3’x3′ window, silicone WINDOW
- O – 3’x6′ 8” door, silicone RAILINGS AND BALUSTERS
- Cement, sand, gravel
- 4” screws – to secure the joists, the bottom plates
- Corner brackets – to lock the joists into place
- 2 1/2” deck screws – to install the roofing sheets
- 4” screws – to secure the rafters
- 1/2” roofing nails – to install the shingles
- 1×4 trims – around door and window
Tools
- Safety gloves, glasses, Circular saw
- Hammer, spirit level, carpentry pencil
- Ladder, Posthole digger
- Power mixer
Tips
- Lay out the storage shed in a professional manner, using batter boards and string
- Plumb the walls using a spirit level and braces
- Cover the roof of the garden shed with asphalt shingles
Time
- Two weekends, two workers
Related
My best tips for building garden shed:
A gable garden shed is a practical and attractive storage solution for your backyard. With its classic, sloped roof design, it’s perfect for storing tools, garden equipment, or even using as a workspace. Here are my best tips for building a sturdy and functional gable shed.
1. Plan Your Design and Size
Before you start building, carefully plan the size and layout of your shed:
- Size: Common sizes for garden sheds are 8×10 feet or 10×12 feet, but you can adjust the dimensions based on your needs and available space.
- Roof pitch: A gable roof has two sloping sides that meet at a peak in the center, providing excellent water runoff. Choose a roof pitch of at least 4:12 (4 inches of rise for every 12 inches of run) to ensure proper drainage.
- Windows and doors: Plan for windows to allow natural light in, and make sure the door is wide enough for easy access to tools or larger items like lawnmowers.
Proper planning ensures your shed will meet your storage needs and fit well into your yard.
2. Prepare the Ground
A solid foundation is key to building a long-lasting shed:
- Level the ground: Clear and level the ground where the shed will sit. Use a spirit level to make sure the surface is flat.
- Choose a foundation: You can build your shed on a concrete slab, pavers, or a wooden frame. Concrete provides the most stable base, while a wooden frame can elevate the shed slightly off the ground to protect it from moisture.
A strong foundation prevents shifting or settling over time and ensures the structure is level and stable.
3. Build the Floor and Frame
The frame is the backbone of your shed, so it needs to be strong and well-constructed:
- Floor frame: Use pressure-treated 2×6 lumber to build the floor frame. Space the joists 16 inches apart and attach them to the perimeter with galvanized nails or screws. Cover the frame with 3/4-inch plywood to create a sturdy floor.
- Wall frame: Construct the walls using 2×4 studs, spacing them 16 inches apart. Make sure to leave room for the door and any windows.
- Roof frame: The gable roof is made by attaching trusses to the top of the wall frames. Use 2×4 lumber to create the trusses and angle them to form the peak of the roof. Space the trusses 24 inches apart for proper support.
Building the frame correctly ensures the shed is structurally sound and can support the roof and walls.
4. Install the Roof
The gable roof is the defining feature of your shed, providing protection from the elements:
- Roof sheathing: Attach plywood sheathing to the trusses, ensuring it extends beyond the walls slightly to allow for rain runoff.
- Install the roofing material: You can use asphalt shingles, metal roofing, or corrugated sheets for the roof. Make sure to install the roofing material from the bottom up to create an overlap that prevents water from entering.
- Add flashing: Install flashing along the roof edges and ridge to prevent water from seeping in.
A well-installed roof will protect your shed and ensure water drains properly.
5. Install Siding and Windows
To protect your shed and give it a finished look, install siding and windows:
- Siding: Choose between wooden lap siding, vinyl, or T1-11 plywood siding. Attach the siding to the frame using galvanized nails or screws, making sure to overlap each row for added protection.
- Windows: Install windows to allow natural light in. Use weather-resistant caulk around the window frames to prevent leaks.
- Doors: Build or install the door, ensuring it fits properly within the frame. A double-door design is useful if you plan to store large items in the shed.
Siding and windows add both functionality and aesthetic appeal to your shed.
6. Paint or Stain for Protection
Once the shed is built, apply a protective coating to ensure it lasts for years:
- Paint: Use exterior-grade paint to protect the wood from moisture and UV damage. Light colors help reflect sunlight and prevent heat buildup.
- Stain: If you prefer a natural look, apply a wood stain to enhance the grain and protect the wood from the elements.
Painting or staining your shed not only protects it from the weather but also enhances its appearance.
Bonus Tip: Add Shelves and Hooks Inside To maximize storage space, consider adding shelves, hooks, or even a workbench inside the shed. This helps keep tools organized and easy to access.
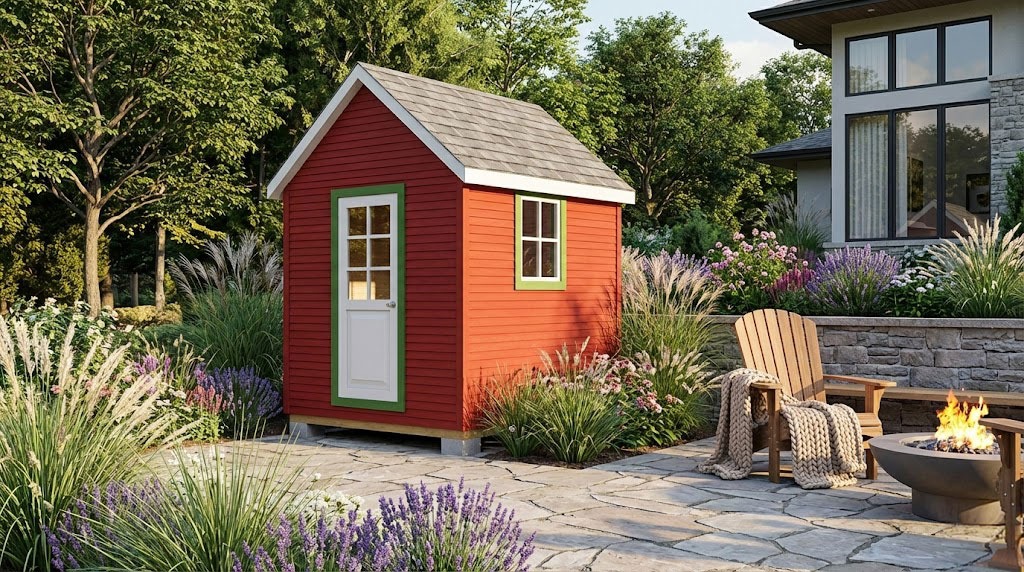
Garden shed plans free

Free Garden Shed Plans
Building a garden shed may look as a complex woodworking project, especially for amateur handymen, but it is actually pretty straightforward, provided you select the plans with great care and select the materials properly. As you can see in the image, there are several components you have to build from pressure treated lumber and assemble together with galvanized screws. Check out my 12×16 shed plans, as well!
How to build a garden shed

Laying out the garden shed
The first step of the building process is to lay out the shed in a professional manner. Therefore, we recommend you to build several batter boards from 2×4 slats and string, to set the perimeter of the construction.

Footings form
After you have set the layout of the shed, you have to pour the concrete footings, that will support the weight of the wooden construction. Therefore, you have to cut 2×8 wooden boards and lock them together with screws.
The footings have to be at least 3′ deep (6” below the frost line) and at least 8” wide, otherwise they won’t be able to support the sill plates and the rest of the construction.

Concrete footings
After you have dug the holes, you have to pour a 4” layer of gravel and compact it thoroughly. Next, prepare a small quantity of concrete using the following mix: 2 parts cement, 3 parts sand, 4 parts gravel and water. The consistency of the concrete should be similar to cream. Pour the concrete in the forms and let it dry for at least 48 hours.

Garden shed floor joists
Lay 2×6 wooden sills above the concrete footings, as in the image. Next, you have to secure 2×6 perimeter joists along the exterior edges of the sills, by toenaling them with 4” screws. Use a spirit level before driving in the screws, otherwise the floor won’t be horizontal.
Afterwards, you have to cut several 2×6 joists and anchor them to the perimeter beams. From our experience, we recommend you to place the joists every 16” on center.

Securing the floor joists
In this image, you can easily notice the manner in which you have to anchor the joists to the perimeter beams. Therefore, we recommend you to use metal corner brackets or joists hangers and drive in several screws through the pre-drilled holes.

Installing shed’s flooring
After you have built the frame of the garden shed, you should to install 3/4” plywood and lock it into place with 2 1/2” decking screws. Work with great care and with good judgement to get the job done in a professional manner.
Wall shed plans

Garden shed window frame
Next, you have to frame the walls of the shed, by using 2×4 pressure treated slats. As you can notice in the image, we recommend you to frame a window on one side of the shed, to let the light in.
Make sure you place the wooden studs every 16” on center, equally spaced. When fastening the walls to the floor of the shed, you have to brace them temporary with 2×4 slats. Drive 4” screws trough the bottom plate of the walls, in the joists.

Diy garden shed plans
Continue the project by installing the opposite wall of the shed in the same manner described above. Work with great care and plumb the walls before anchoring them to the floor.
From our own experience, we recommend you to assemble the wall structure on the ground and afterwards lift it on the floor with the help of another person. Make sure you frame the window properly, installing a double header and extra trimmer studs.

Garden shed door plans
Afterwards, frame the rest of the walls, in the same manner described above. Nevertheless, as you can see in the image, you should leave enough space to fit a door. Therefore, you have to decide the dimensions of the door you are going to use and frame the wall accordingly.

Garden shed plans free
Drive in 3” screws every 15” along the joints between perpendicular walls, to increase the rigidity of the frame. Work with great care and with good judgement, if you want to obtain a professional result.
Don’t forget to plumb the walls before setting them into place. If you want to let more natural light in the garden shed, you can make the window bigger or place another one on the opposite wall.

Installing exterior siding on the garden shed
Install the exterior siding to the walls. Insert 1 1/4 finishing nails trough the 5/8” siding in the studs, by using a nail gun or a screwdriver. Make sure the siding cover the rim joists, in order to get a neat appearance.
You could also install siding on the interior faces of the garden shed. Nevertheless, if your budget is tight, you can still get the job, without installing siding on the interior faces of the shed.
Roof shed plans

Garden shed roof plans
As you can see in the image, you have to build the trusses on the ground and then secure them into place, by inserting 4” screws. Cut the components with a miter saw and then lock them together with 1/2” plywood gussets.
Measure the rafters properly, as the trusses must be same, otherwise it will be impossible to install the roofing sheets. Toe-nail the rafters to the top plates, by inserting 4” screws, after drilling pilot holes.

Garden shed roof plans
Building the roof of the shed can be done in many ways, but in this diy article we show you a quick technique. Assemble A-shaped trusses for the garden shed plans on the ground, making sure they all have the same shape and size.

Installing roof sheeting
Lift the trusses, plumb them with a spirit level and drive in several screws through the bottom element of the trusses in the top plate of the walls. Fasten 1/2” plywood sheets to the wooden rafters, by inserting 2 1/2” screws, every 10”. Afterwards, install roofing felt over the plywood sheets.

Garden shed front overhang
As you can see in the image, the shed should overhang about 10” in the front and back faces, to drain the water properly and to add character to your construction. After you build the four sets of double rafters, you should align them properly and lock them into place with 3” screws.
Work with great care and judgement, as everything has to be neat and look symmetrical. Buy galvanized screws, as they are highly resistant to water.

Installing drip caps
Before installing the shingles, you have to fit drain caps along the edges of the roof. In this manner, the roof will drain the water efficiently, protecting the shed against damages. The bottom drip cap should be placed under the roofing felt, while the side ones should be above.
Seal the gaps with silicone or with other products designed for this task, otherwise the water might damage the roof sheeting.

Installing the trims
Next, install 1×6 wooden trims to the rafters, as they will complete the appearance of the garden shed and mask the edges. In order to get the job done like a pro, we recommend you to insert 2” finishing nails.
You could also install 5/8” plywood to the interior face of the overhanging rafters, by inserting 2” screws. Fill the gaps with waterproof silicone and apply several coats of paint or varnish.

Installing asphalt shingles
Next, fit the asphalt shingles starting with the bottom of the roof. We recommend you to pay attention to the instructions provided by the manufacturers of the shingles, before fitting them on the roof.
When installing the shingles, they have to overhang about half an inch over the drip caps. Cut individual shingles and use them to build the top ridge caps. Seal eventual gaps with appropriate products.

Wood garden shed plans free
After you have sealed the roof of the garden shed, you have to fit the door and windows. If you have planned everything accurately, they should fit without any problems, but if you have to adjust their dimensions you could use a jointer.
By following these tips, you’ll be able to build a sturdy and attractive gable garden shed that provides plenty of storage and enhances the look of your backyard. With proper planning, materials, and attention to detail, your shed will be a functional space for years to come.
Thank you for reading our article about garden shed plans free and we recommend you to check out the rest of our projects. Don’t forget to share our projects with your friends, by using the social media widgets.