This step by step diy article is about how to build a pizza oven shelter. After building an outdoor kitchen, you should also consider adding a nice wooden shelter, to protect the construction from bad weather. If you use the proper tools and materials, and follow our instructions you can get the job done by yourself and save a significant amount of money. However, you should have the basic woodworking skills and take accurate measurements, otherwise the components might not fit together. This is Episode 6 of the Brick Pizza Oven Series, so make sure you take a look over the rest of the articles.
We recommend you to study the local building codes, before starting the project, as there are many requirement you have to comply with. The weather condition specific to the place were you leave influence almost every area of the project. Therefore, you should ensure the footings are just below the frost line and the frame of the construction is rigid. Pay attention to the junction between the roof and the shelter, as it could easily ignite, if you don’t take into account the basic safety measures.
Moreover, you have to plumb the posts and to level the rest of structure. Always check if the corners are square, before installing a components. In addition, pre-drill the lumber before inserting the wood screws, to prevent the wood from splitting. Take accurate measurements before cutting the components, otherwise they might not fit together easily. Work with great care and attention, if you want to obtain a professional result. See all my Premium Plans in the Shop.
Made from this plan
Materials
- Sand, cement, anchors – FOOTINGS
- 4×4 lumber – FRAME
- 2×4 lumber – RAFTERS
- 3/4” paneling – ROOFING
- 6×6 anchors
- rafter ties
- 1 1/2″ structural screws
- 3″ screws
Tools
- Safety gloves, eye protection
- Drill machinery, hammer
- Miter saw, circular saw, Sander, router
Tips
- Take accurate measurements before cutting the components
- Drill pilot holes in the lumber, to prevent the wood from splitting
Time
- One weekend
Related
- PART 1: Building the base of the pizza oven
- PART 2: Building an outdoor pizza oven
- PART 3: Insulating the brick pizza oven
- PART 4: Building an outdoor stove
- PART 5: Finishing the outdoor pizza oven
- PART 6: Building a shelter for the pizza oven
Build a pizza oven roof

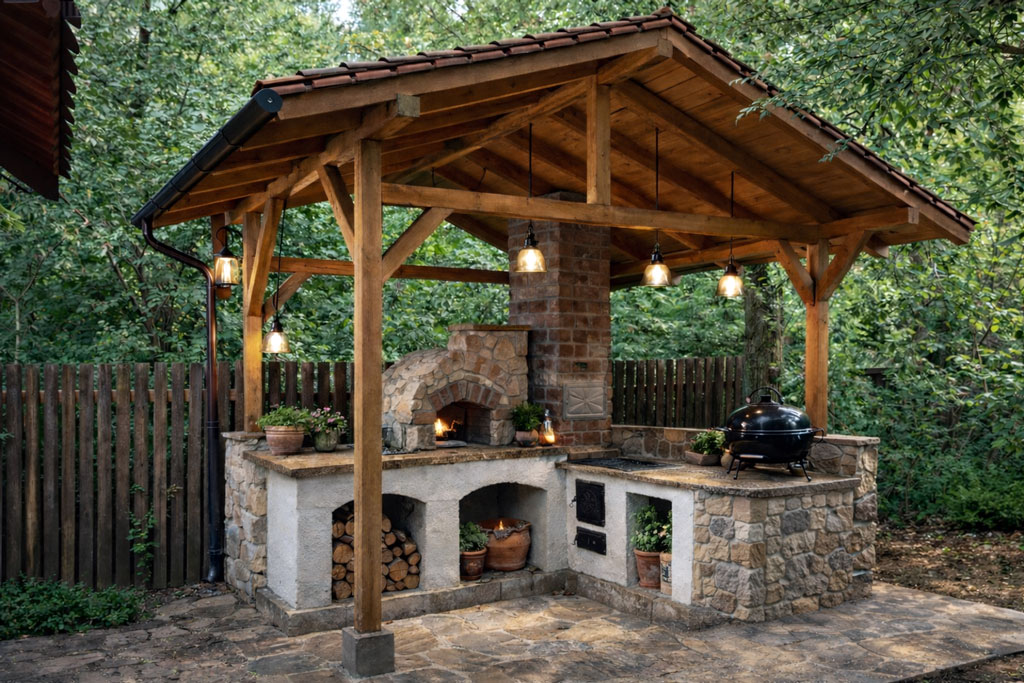
Building a pizza oven shelter
If you want to protect your outdoor kitchen from bad weather, or you just want to get a large shaded are for the hot summer days, building a wooden shelter is the right solution to your needs. Build the frame from 4×4 lumber, while the rafters should be made of 2×4 lumber.
Building a shelter for the pizza oven

Anchoring the post into concrete
The fist step of the project is to install the 4×4 or 6×6 wooden posts. Therefore, you have to choose from several option, such as fitting the posts into concrete, pouring concrete footings or attaching them to a slab. If you live in a windy area or with harsh winters, we recommend you to set the posts into concrete.
Dig 2′ deep holes, plumb the posts and secure them with braces, before pouring the concrete.

Installing the frame of the pizza oven
After installing the posts into place, let the concrete to dry out properly for a couple of days. Afterwards, install the rest of the wooden components, as in the image. In order to prevent the wood from splitting, you should pre-drill the lumber before driving in the 3” screws.
Notch the ends of the components, as in the image, before locking them into place. Level the frame with a spirit level.

Roof rafters plans
The next step of the project is to install the rafters to the structure. In order to build a durable roof for the pizza oven, we recommend you to cut the rafters from 2×4 lumber, using the information from the diagram.

Installing the roof rafters
After building all the roof rafters, you should fit them into place, align them at both ends and drive in the 3 ” screws into the frame. However, don’t forget to pre-drill the lumber, otherwise it might easily split. Use the information from the free plans, in order to install the rafters properly.

Outdoor kitchen shelter
Afterwards, you should install the 4×4 braces to increase the rigidity of the frame. Work with great care and attention, if you want to obtain a professional result. Cut the ends of the braces at 45º, using a miter saw. In this manner, you can get the job done quickly and accurately.
Continue the project by installing 3/4” paneling to the rafters. Usually you should start the installation with from the bottom to the top, but in this case it was easier to do it the other way around. Use 2” nails to secure the boars to the rafters.

Roofing shelter plans
In this image, you can see the structure of the roof from another angle. You need to pay attention to the details, otherwise the construction won’t have a neat appearance. Take accurate measurements several times before making the cuts, otherwise the components might not fit into place.

Roof around chimney
As you should notice in the image, there has to be a gap of at least 1” between the chimney and the roof, otherwise it might easily ignite. Read carefully the legal requirement before starting the construction of the shelter, as there are many regulations you have to comply with.

Roof structure
As we have already emphasized, you need to make the structure more rigid, by fitting 4×4 braces. Cut their ends at 45º, as to obtain a neat appearance. Drill pilot holes at both ends of the braces, before inserting the wood screws. Ask a friend to hold the braces into place, making sure they are flush with the frame, otherwise the shelter won’t have a nice look.
After each step of the project, you need to make sure the corners are square (use a carpentry square) and the posts are perfectly plumb.

Building a pizza oven roof
Last but not least, you should take care of the finishing touches. Therefore, you have to fill the holes with a good wood filler and let it harden for several hours, before smoothing the surface along the wood grain, with 120-grit sandpaper. Vacuum the residues and apply several coats of paint or wood stain, to protect the shelter from rot. This is Episode 6 of the Brick Pizza Oven Series, so make sure you take a look over the rest of the articles.
Thank you for reading our article about how to build a shelter for the pizza oven and we recommend you to check out the rest of the outdoor kitchen projects. Don’t forget to share our project with your friends, if you’ve found this article useful, using the social media widgets.
1 comment
Please, give me the plans, I really want to build this at my farm.