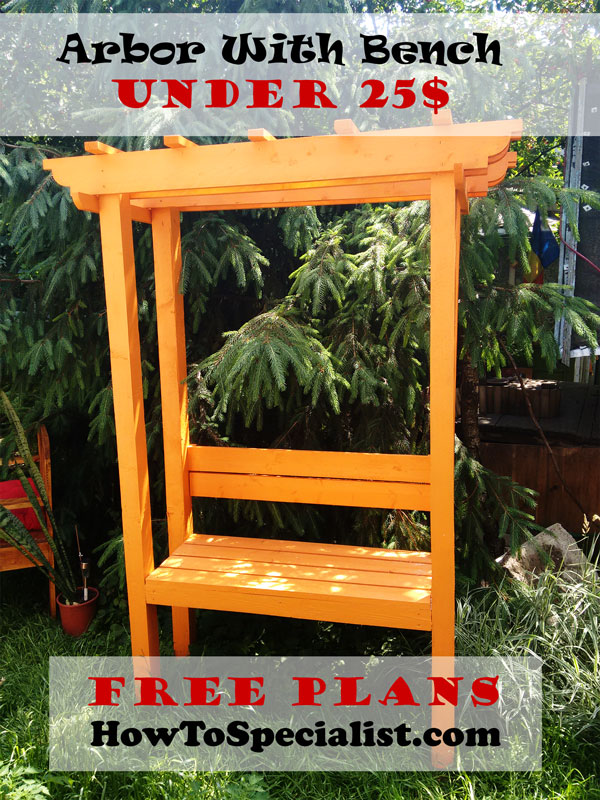
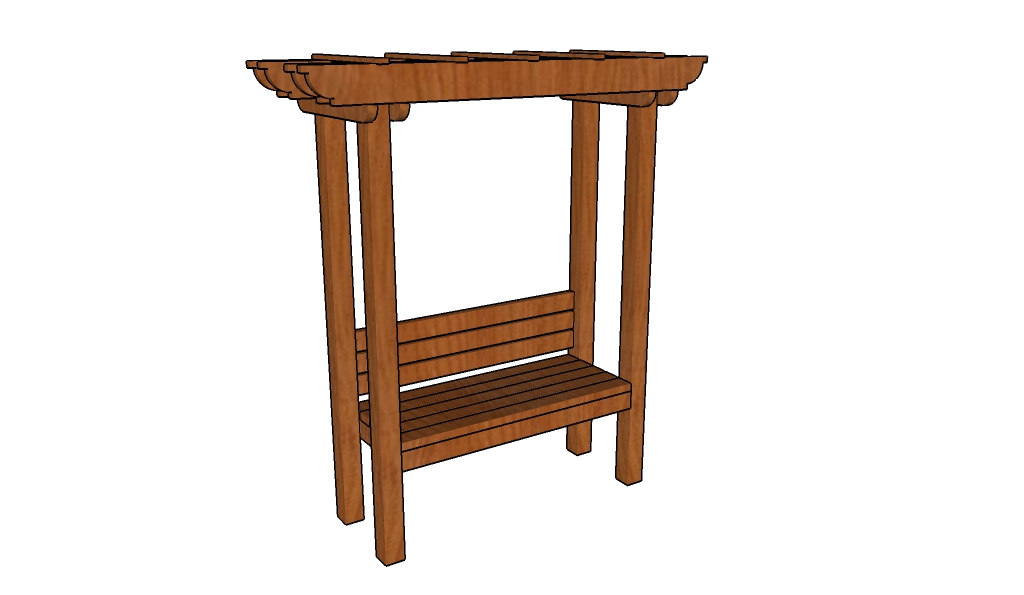
This step by step diy project is about how to build a garden arbor bench. If you want to learn more about building a sturdy diy arbor bench for your garden, pay attention to the instructions shown in this tutorial. This project is ideal for any backyard, especially if you like spending time in your backyard. I managed to build this garden bench with common materials and tools. With as little as 25 $ you can create a cozy corner in your garden in just one weekend.
You should always plan everything from the very beginning, in order to prevent costly mistakes and to save time. If this is your first project, you need a friend to give you a hand when assembling the arbor bench. Invest in high quality lumber and plywood, as the components will be exposed to bad weather. Protect the components with appropriate paint or stain.
There are a few tips that you should take into account, if you want to get a professional result. Therefore, take accurate measurements and use professional tools when making the cuts or when drilling pilot holes. Align the components at both ends and add waterproof glue to the joints, if you want to create a rigid structure. See all my Premium Plans in the Shop.
Made from this plan
Wooden arbor plans

Building an arbor with bench
Materials
- A – 4 pieces of 4×4 lumber – 80″ long POSTS
- B – 2 pieces of 2×4 lumber – 48″ long, 3 pieces – 16 1/2″ long SEAT FRAME
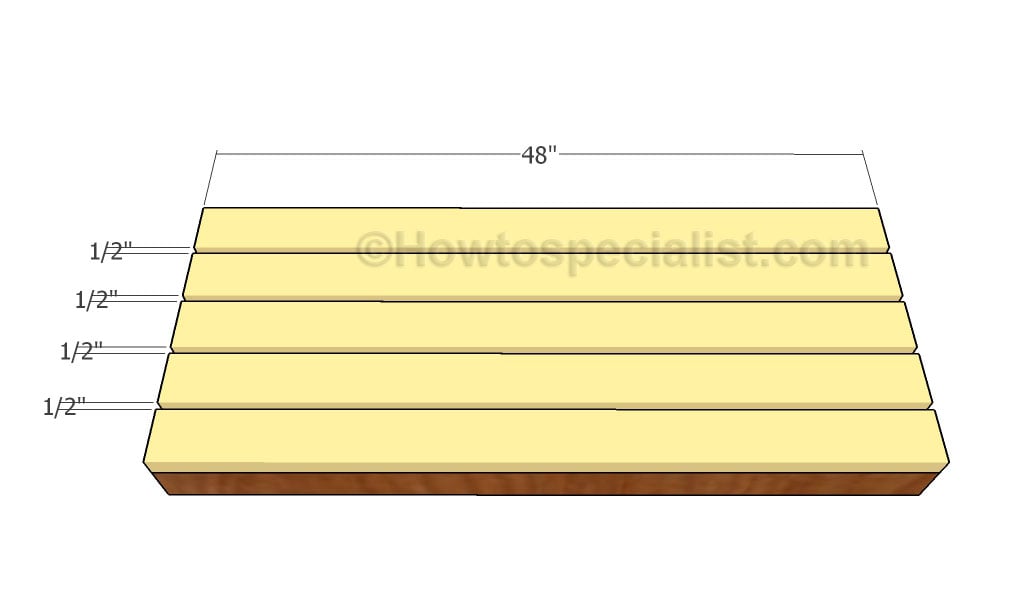
- C – 5 pieces of 2×4 lumber – 48″ long SEAT
- D – 3 pieces of 2×4 lumber – 48″ long BACKREST
- E – 4 pieces of 2×6 lumber – 75″ long RAFTERS
- F – 4 pieces of 1×3 lumber – 26 1/2″ long SUPPORTS
- G – 5 pieces of 1×2 lumber – 24 1/2″ long SLATS
- 4 pieces of 4×4 lumber – 8 ft
- 6 pieces of 2×4 lumber – 8 ft
- 4 pieces of 2×6 lumber – 8 ft
- 1 piece of 1×3 lumber – 10 ft
- 2 pieces of 1×2 lumber – 8 ft
- 100 pieces of 2 1/2″ screws, 8 pieces of 7″ carriage bolts
- glue, putty, paint
Tools
- Safety gloves, glasses, Miter saw, jigsaw, pocket hole jig
- Chalk line, tape measure, spirit level, carpentry pencil
- Drill machinery and drill bits
Tips
- Use a good miter saw to make the angle cuts
- Drill pilot holes before inserting the screws
Time
- One Day
Related
DIY Garden arbor plans
How to build an arbor with bench
Build this simple garden arbor with less than 25 $ if you choose pine or pressure-treated lumber. If you go for cedar or better quality lumber, the total cost is likely to go up a little. However, this is still a great score for a weekend project that will enhance the look of your backyard for years to come.
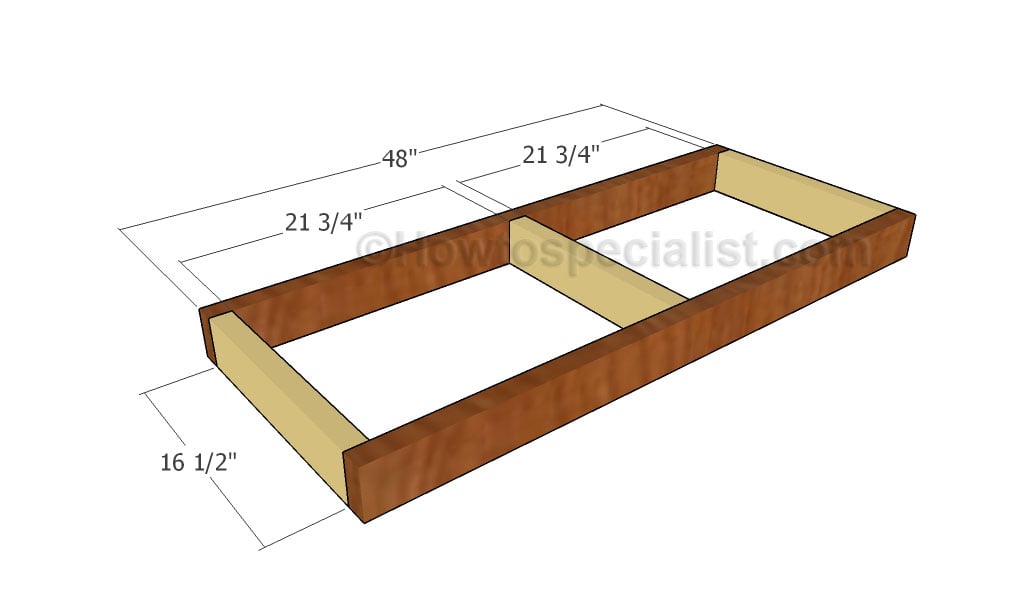
Building the seat frame
The first step of the project is to assemble the seat frame for the arbor bench. Cut the 2×4 components at the right dimensions. Drill pocket holes at both ends of the short components and secure them with 2 1/2″ screws to the front and back supports. Align the edges with attention and make sure the corners are square.
Attaching the seat slats
Cut the seat slats out of 2×4 lumber. Fit the slats to the frame, placing them equally-spaced. Drill pilot holes through the slats and insert 2 1/2″ screws into the frame. Smooth the cut edges with fine-grit sandpaper.
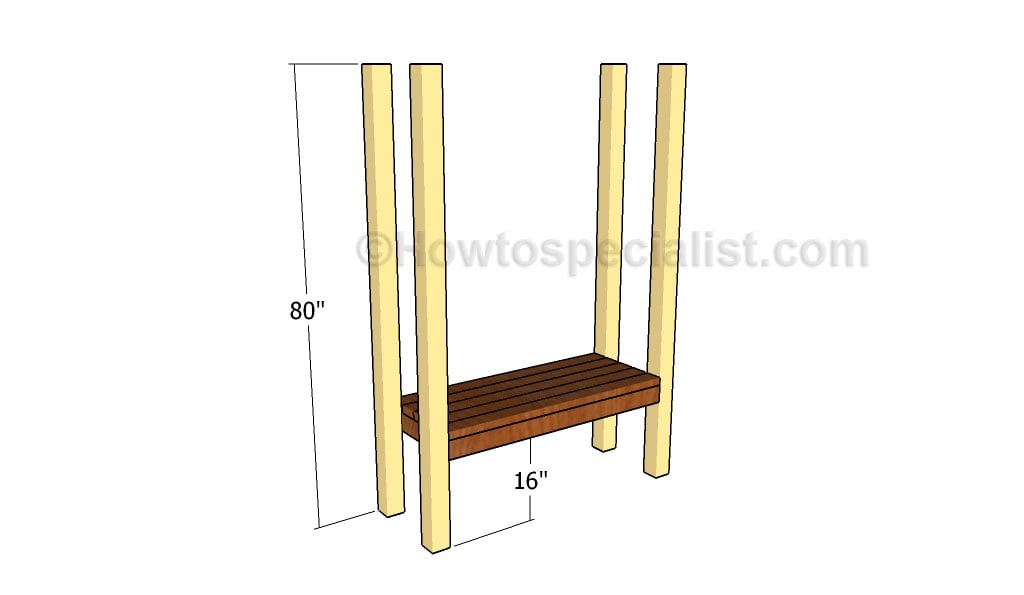
Attaching the legs
Next, you need to attach the 4×4 legs to the garden arbor with bench. Drill pilot holes through the legs and insert 5″ screws into the seat frame. Make sure the posts are plumb and double-check if the corners are square. If you want a permanent structure, you can set the posts in 2-3′ deep footings.
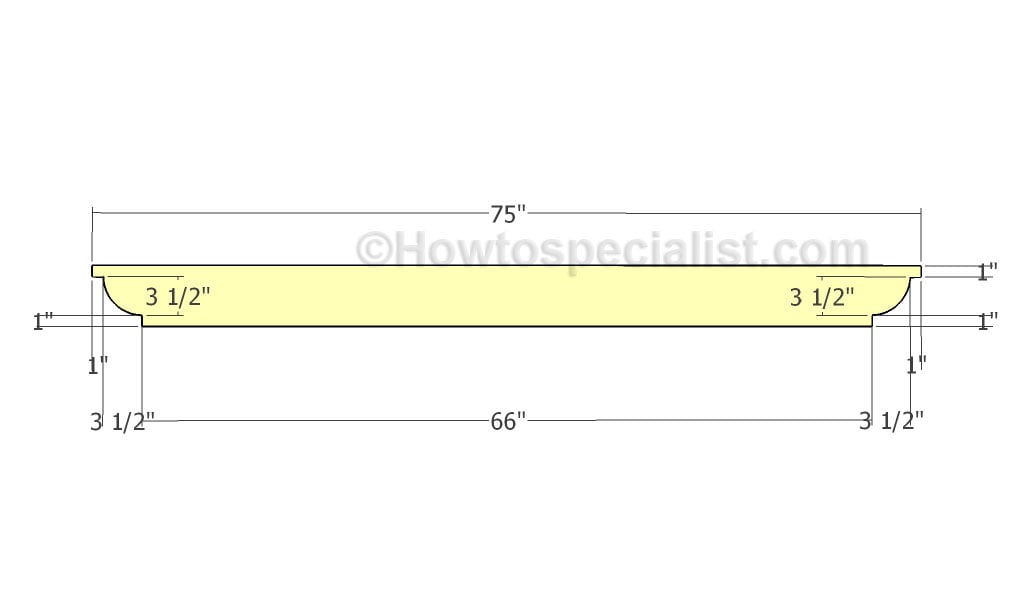
Building the top rafters
Build the rafters using 2×6 beams. Use a jigsaw to make the ends of the beam decorative. Smooth the edges with 120-150 sandpaper.
Attaching the rafters
Clamp the rafters to the top of the posts. Use a spirit level to check if the rafters are horizontal. Drill pilot holes through both the rafters and posts and insert 7″ carriage bolts. Two bolts for each post is enough to create a strong structure. Alternatively, you can drill pilot holes and insert 3 1/2″ screws on each side of the posts.

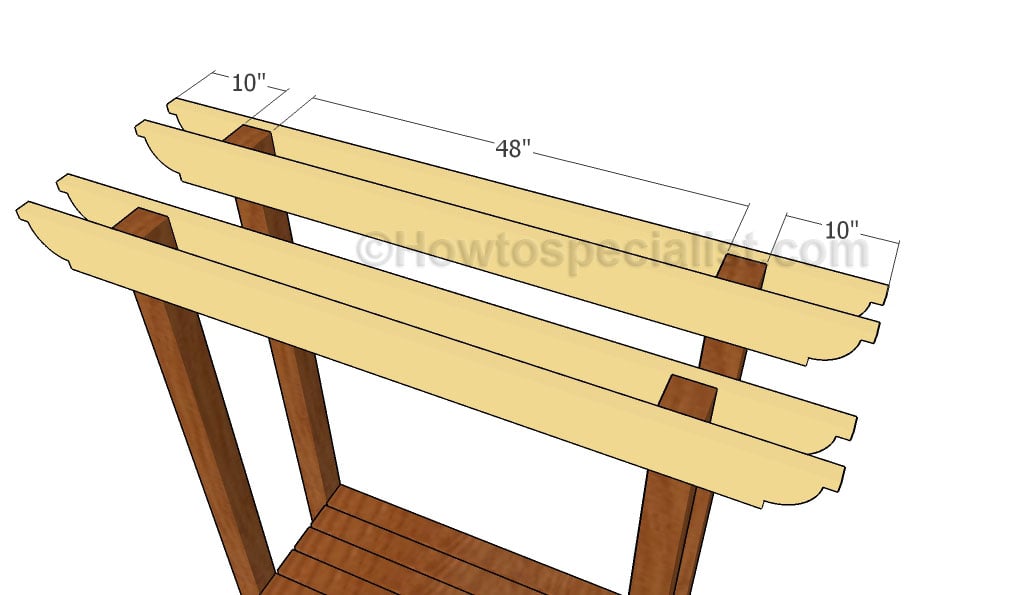
Fitting the rafter supports
Fit 1×3 supports to both sides of the arbor, under the rafters. Round the ends of the supports using a jigsaw. Use 2 1/2″ screws to secure the supports into place.
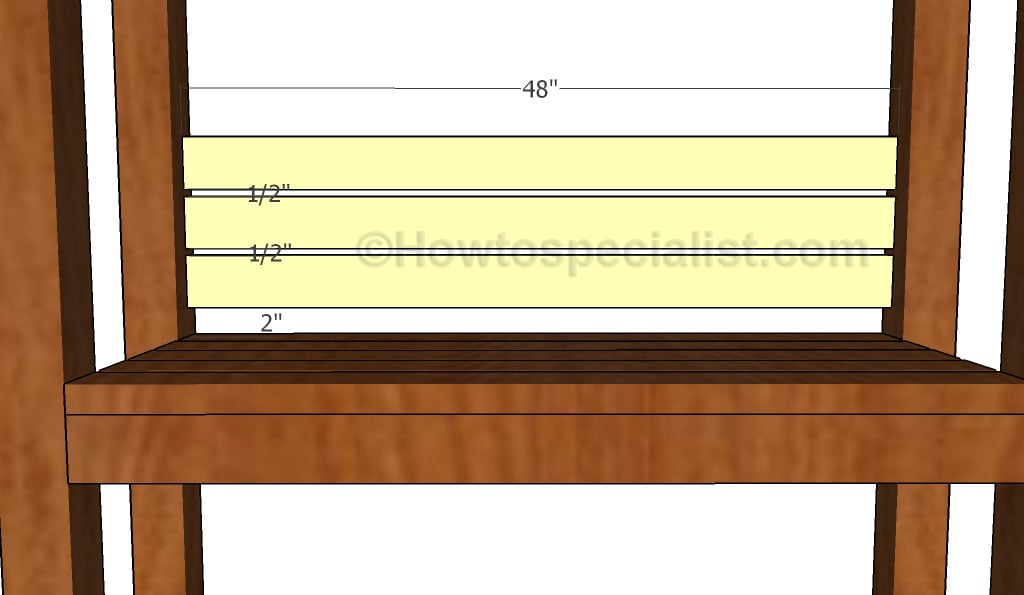
Fitting the backrest slats
Use 2×4 slats to build the backrest of the arbor. Drill pocket holes at both ends of the slats and secure them to the posts using 2 1/2″ screws. Place the slats equally-spaced for a professional result.
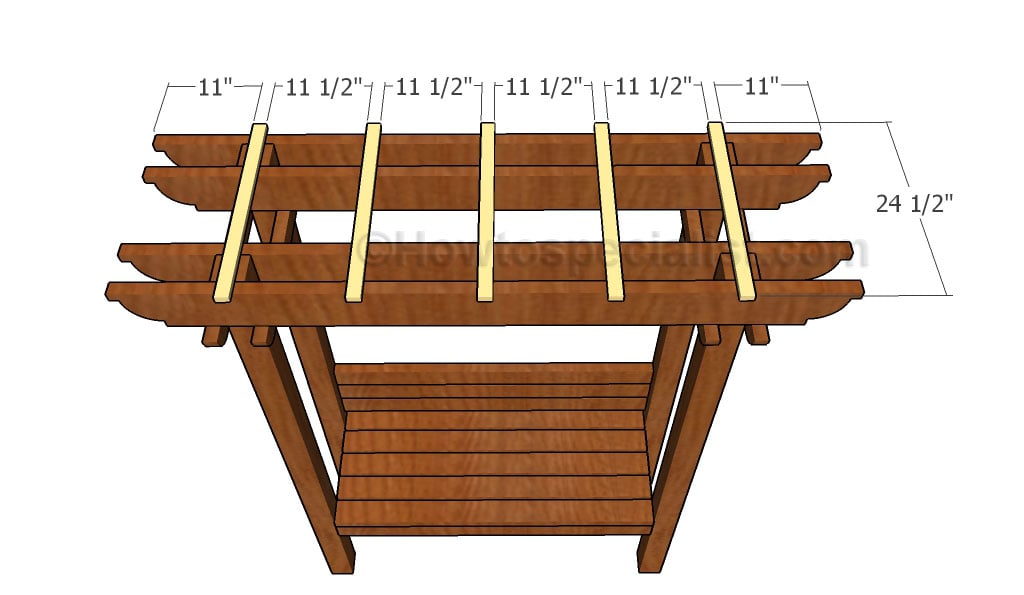
Fitting the top slats
Last but not least, attach 1×2 slats to the top of the rafters, as shown in the diagram. Drill pilot holes though the slats and insert 1 1/4″ screws into the rafters. Place the slats equally-spaced, for a symmetrical appearance.
How to build an arbor bench
As you can see in the garden arbor plans, building it requires basic materials and average woodworking skills. See in the next tutorial how I built my own arbor, step by step.
How to build a garden arbor with bench

Building the frame
First of all I assembled the seat frame. I used 4×4 lumber for the frame, as I tried to use the scrap lumber in my yard, as much as possible. As you can see in the image, the edges are aligned and the corners perfectly square.
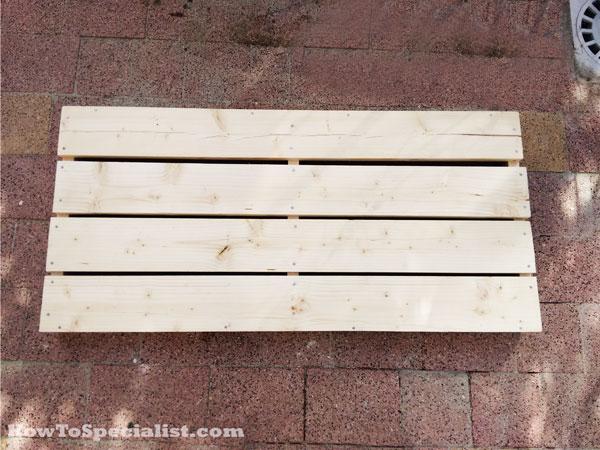
Fitting-the-seat-slats
Next, attach the slats to the seat frame. I have used 2×6 boards instead of 2x4s, as in the plans, from the same considerations. You can choose the most convenient option for your budget and tastes. Drill pilot holes through the slats and insert 2 1/2 screws into the frame.
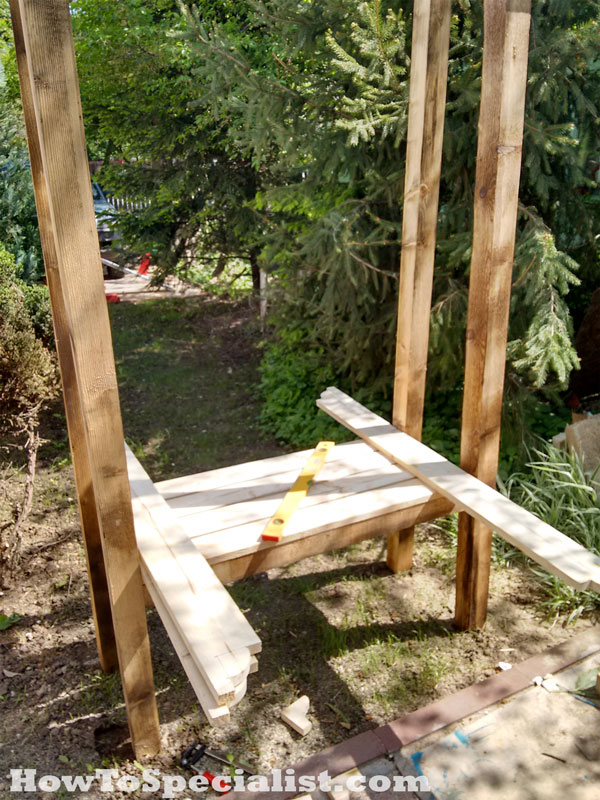
Attaching-the-legs
Attach the 4×4 posts to the seat. I chose not to set the posts into concrete, so I can move the arbor easily from one location to another. The structure might look as lacking support right now, but I assure you that after fitting the rest of the components, the arbor will be super-rigid.
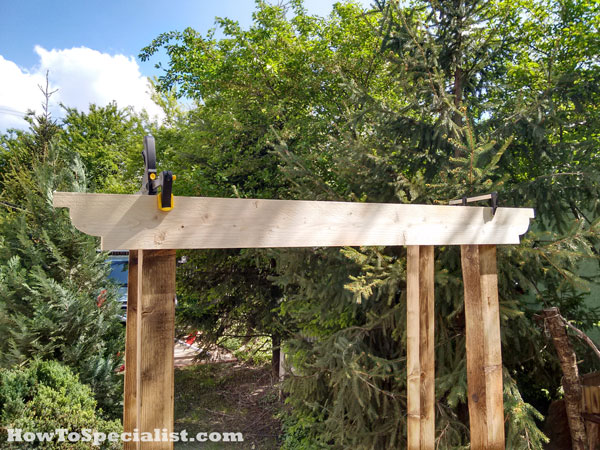
Attaching-the-rafters
Build the rafters, making sure you cut both ends in a decorative manner. Clamp the rafters to the top of the posts and make sure they are horizontal. I used 3 1/2″ screws to secure the rafters to the posts, instead of 7″ carriage bolts. If you want to disassemble the arbor, using carriage bolts would be a better option for you. However, irrespective of your choice, make sure the corners are square and the rafters are perfectly horizontal.
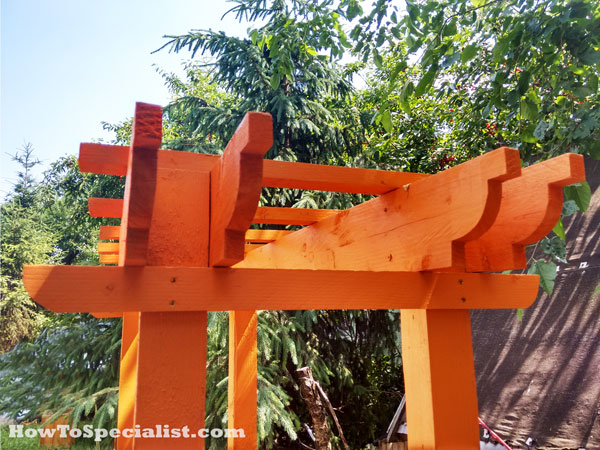
Fitting the rafter supports
Fit 1×3 supports under the rafters, as in the image. Use 2 1/2″ screws to secure the supports to the posts. Make sure you plumb the posts before inserting the screws, to get a proper structure.
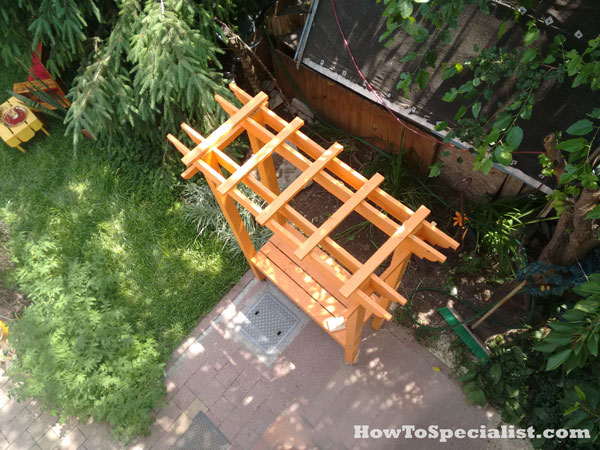
Attaching-the-top-slats
One of the last steps of the project is to attach the 1×2 supports to the top of the rafters. Use 1 1/4″ screws to secure the slats to the rafters.
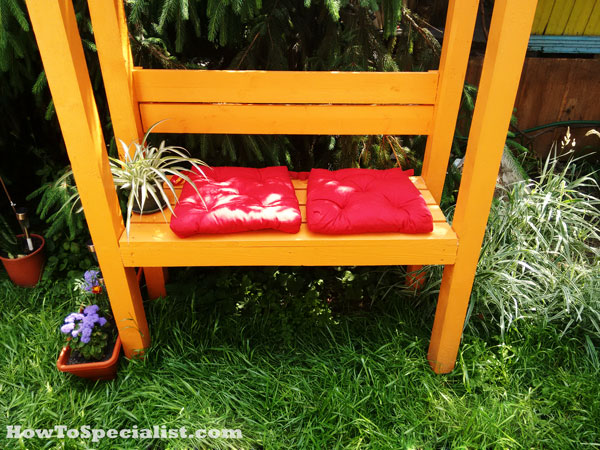
Arbor bench
Attach thhe 2×4 slats to the back of the garden arbor, to create the backrest. Drill pocket holes at both ends of the slats and secure them to the posts using 2 1/2″ screws. Check if the slats are horizontal, before inserting the screws.
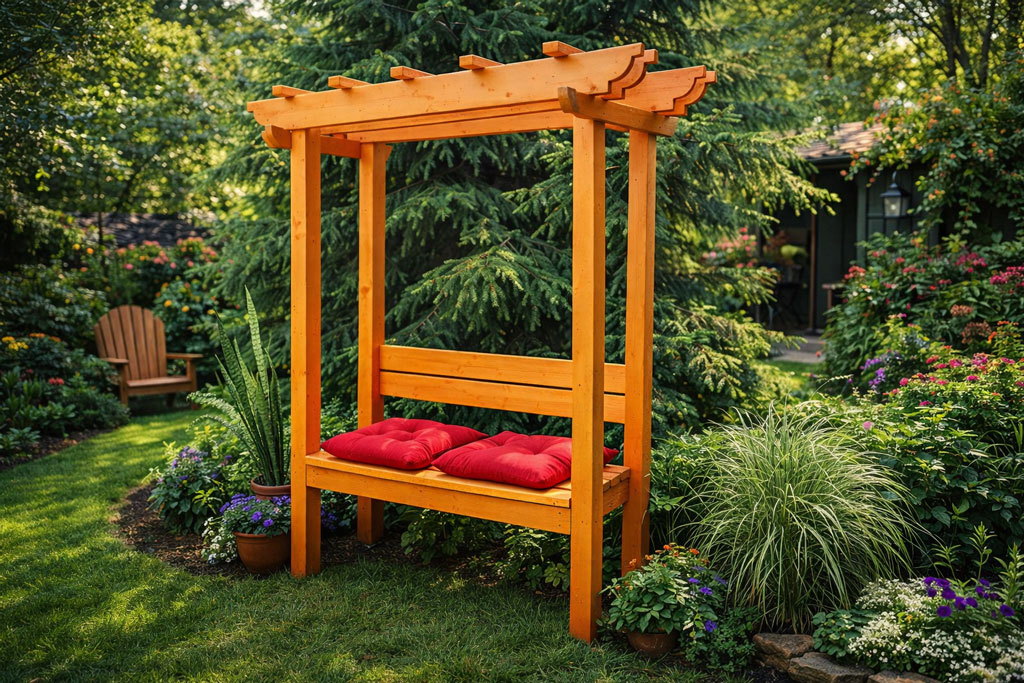
Arbor with bench plans
Fit a few cushions to the bench seat and enjoy you new arbor bench. After the hard work, you deserve a rest and a glass of lemonade.
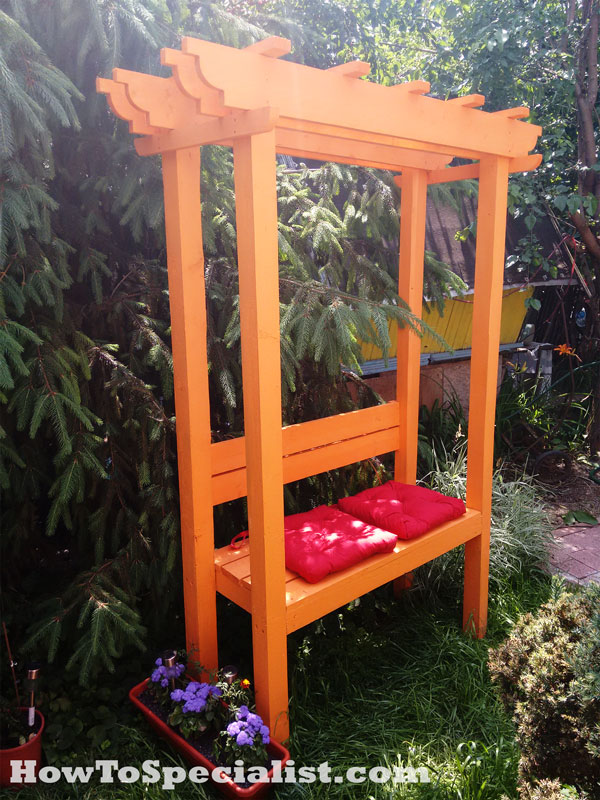
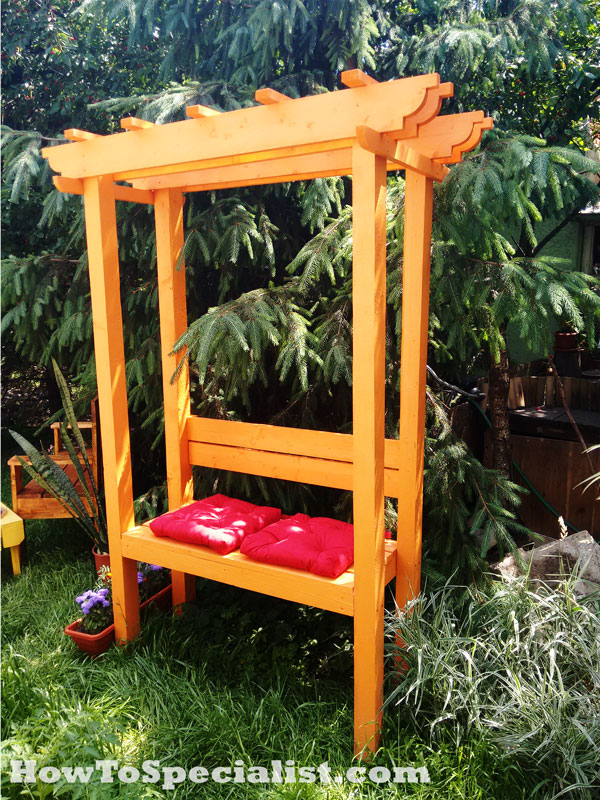
Simple arbor bench
I hope you enjoyed this this step by step tutorial and take a look over the rest of my projects.
I would love to hear your feedback and to see your pins, likes and shares. If you build this diy garden arbor bench don’t forget to send a few pics.
Thank you for reading our project about how to build an arbor with bench and we recommend you to check out the rest of the projects. Don’t forget to SHARE and LIKE our projects with your friends, by using the social media widgets, if you want to help us keep adding free woodworking plans.
1 comment
Supposedly this is a free plan, but no matter how hold my tongue, I’m unable to print. Get a message “Alert: Content is protected!!” If this is really a free plan. what’s the secret? If it’s not free, that’s good to know, too. Thank you for the assistance