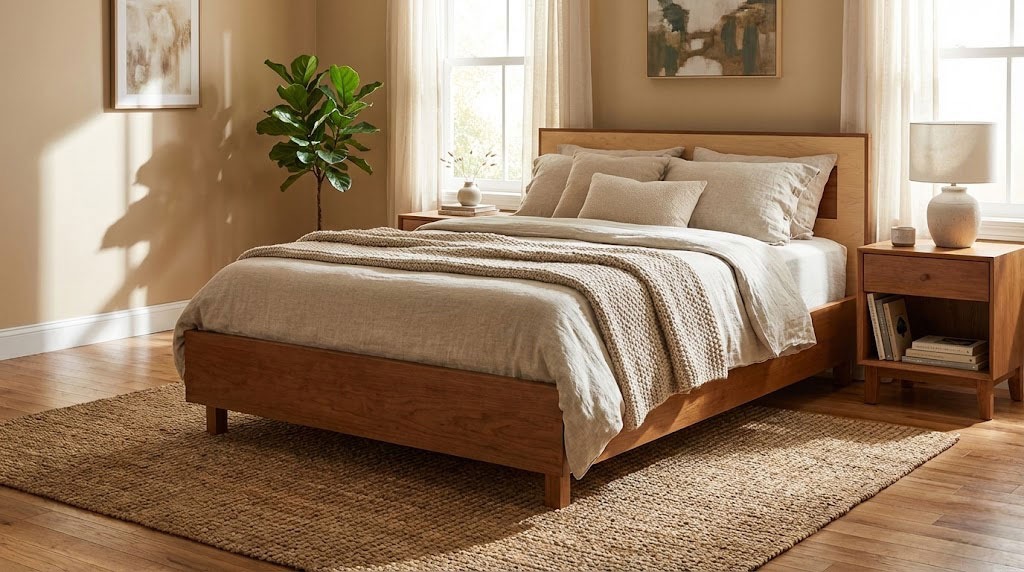
This step by step diy article is about queen bed frame free plans. Therefore, we will show you bed frame plans with the underlying dimensions and all other aspects one must know before building a diy wooden bed frame. Many people look for queen bed frame plans as they haven’t found yet the right bed to satisfy their tastes and needs, or they just want to build a cheap and simple bed frame by themselves. This project comes as a response to your needs, as if you pay attention to all our tips and follow our guidelines, you will be able to make a beautiful bed frame by yourself, in just a weekend.
Before starting the project or buying any materials, you have to make up your mind about the bed frame you want to build: you need to draw a complete plan. Consequently, you have to decide its dimensions and design. As a recommendation, we think it is better to begin the project with buying the mattress, as to plan the wooden bed frame around its dimensions.
Secondly, you have to buy several quality wooden boards from your local diy store , before building the bed frame. They should be around 10” wide and 1 – 1 1/2 thick. They may be already finished (we strongly recommend you to go for this option) or you have to make them look neat, by using a sander. Irrespective of your choice, make sure the wooden boards are perfectly straight and don’t have any visible flaws (such as chips, cracks). Don’t forget to check out the rest of our step by step furniture projects. See all my Premium Plans in the Shop.
Made from this plan
In order to build a queen bed frame, you need the following:
- 4×4 lumber – POSTS
- 2×10 lumber – FRAME
- 2×2 lumber – CLEATS
- 1×4 lumber – SLATS
- mattress
- 1 1/4″ screws
- 2 1/2″ screws
- 1 1/4″ brad nails
- glue, stain
Tools
- Level, tape measure, carpentry pencil, l-square
- Rubber hammer, hammer
- Jig saw/circular saw
- C-clamps
- Drill machine and drill bits
- Electric screw driver with torque control
Tips
- Read safety and disclaimer pages
- Select with great care the wood boards, otherwise the bed wouldn’t look properly
- When securing the bed joints use clams as to lock the wood boards
- Use a good drill machine with torque control to make pilot holes
- Round the exposed edges with a router and a 1/4” bit
Related
Build a queen bed frame

Queen bed frame plans
You have to use a proper setup when connecting the wooden boards in a corner joint. Make sure the corners are right angled, by using a carpentry square, and drive in the screws after you have drilled pilot holes. In addition, you could build wooden bed frame legs from 4”x4” posts, as to get the job done in a professional manner.
Smart Tip: The cost of this project, without taking into consideration the mattress, will be around 100-200$, which is a true bargain, as we speak of a wooden bed frame with a beautiful modern look. Remember that the plans are for a queen size bed frame, but the techniques are the same for any wooden bed (you can adjust the dimensions to fit your needs).
Queen bed frame plans

Wooden bed frame legs
First of all, you should start by making the legs of the queen bed. Therefore, use 4×4 wooden posts to build four 10” bed frame legs . You can cut the timber to these dimensions with a hand saw, a jigsaw or a circular saw.

Queen bed frame – outside corner joint
The next step is to build the corner joints of our queen size bed frame. Consequently, you have to pre-drill several holes before fastening the wooden boards with wood screws. Use a screwdriver with torque control, as to be able to perform this operation in a professional manner.

Setup for building bed frame corner joint
This is a snapshot from one of our diy bed frame projects, where we show the steps and techniques needed to build the bed, using real images. You should notice that we used four C-clamps to lock the corner joints firmly.

Building bed frame side railings
Next, we have to build the side railings using 2×2 timber. Actually, there are two options: on one hand you can use 2×4 timber and cut out segments, using a jigsaw, as to obtain a shape similar to the one in the image, or you can use a 2×2 cleats on which to fasten 1×2 pieces.

Wooden bed frame corner joint leg
Next, you have to connect the side railings to the bed frame. Consequently, you should use #8 – 2 1/2” wood screws every 6”, to make sure the side railing will be secured properly. In the plans, you should also notice the way it is build the side railing: the wood segments are fastened using two 2” wood screws.

Wooden bed frame slats
We are getting close to the end of the project, as all we need to do is to install the slats over the side railings of the queen-size bed frame. First, you have to cut 9 wood boards at 60 1/2”. In addition, the boards will have to be made of 1×5 wooden boards, as to fit in the side railings.

Queen wooden bed frame free plans
Fill the head of the screws with wood putty and let it dry out for several hours. Sand the surface using medium-grit sandpaper, before applying several coats of stain.
Thank you for reading our article on wooden queen bed frame plans and you recommend you to check out the rest of our furniture projects. Don’t forget to share our projects with your friends, by using the social media widgets.
2 comments
Thank you very much for posting the plan!
I am planing on building an upholstered twin bed. I was wondering if I could use 1″ plywood instead of 2×10″ for the frame?
No, I don’t recommend that.