This step by step diy woodworking project is about how to build a crib. If you want to learn more about building a wooden baby crib, we recommend you to pay attention to the instructions described in the article. Adjust the design of the crib to suit your needs, as well as its dimensions. Invest in high-quality lumber, making sure the components are in a good visual condition and perfectly straight.
It is essential to lock all the components together tightly, so make sure you drill pocket holes and insert the appropriate galvanized screws. Add waterproof glue to the joints and make sure the corners are square, after fitting each components. Smooth the exposed edges of the baby crib, in order to enhance the look of the project. In addition, adjust the height at which you place the bed frame, according to your needs and tastes.
There are many other bed frame plans to choose from when building one, so make sure you take a look over the similar projects. In addition, plan everything from the very beginning, to prevent costly mistakes and to keep the wastage as low as possible. Leave no gaps between the components when locking them together. Apply a few coats of paint or stain over the components, to protect them from decay. See all my Premium Plans in the Shop.
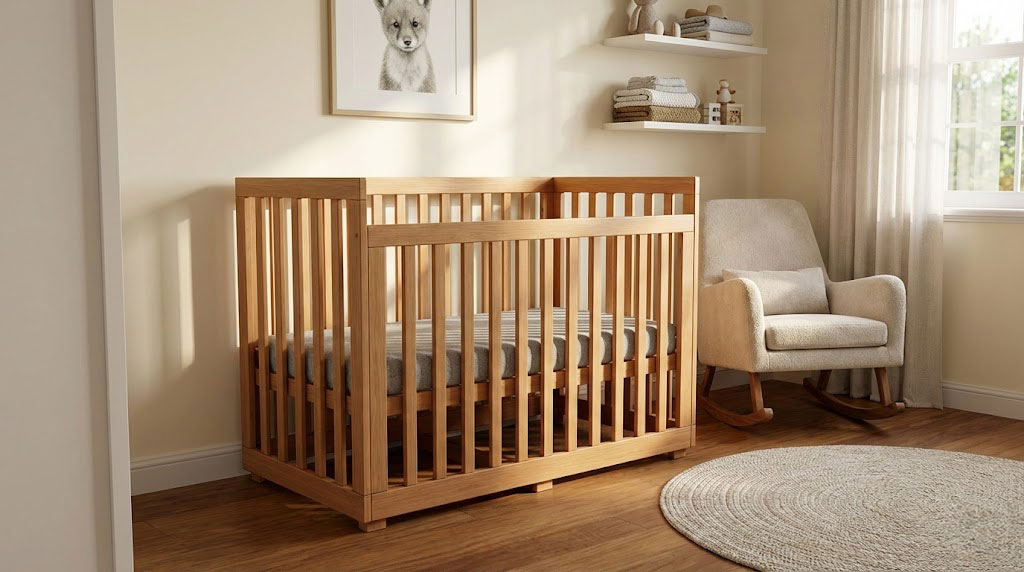
Made from this plan
Baby crib plans

Building a crib
Materials
- A – 4 pieces of 1×3 lumber – 30″, 2 piece of 1×4 lumber – 30″, 10 pieces of 1×2 lumber – 30″ SIDES
- B – 2 pieces of 1×3 lumber – 30″, 1 piece – 53 1/2″, 1 piece of 1×4 lumber – 53 1/2″, 10 pieces of 1×2 lumber – 30″ BACK
- C – 2 pieces of 1×3 lumber – 24″, 1 piece – 53 1/2″, 1 piece of 1×4 lumber – 53 1/2″, 10 pieces of 1×2 lumber – 24″ FACE
- D – 6 piece of 2×3 lumber – 5″ long LEGS
- E – 2 pieces of 1×3 lumber – 27″ long, 2 pieces – 53 1/2″ long BED FRAME
- F – 2 pieces of 1×1 lumber – 52″ long, 11 pieces of 1×3 lumber – 27″ long CLEATS
- 5 pieces of 1×3 lumber – 10 ft
- 2 pieces of 1×4 lumber – 8 ft
- 10 pieces of 1×2 lumber – 8 ft
- 2 pieces of 1×1 lumber – 10 ft
- 1 piece of 2×3 lumber – 3 ft
- 2 1/2″ screws
- 1 1/4″ screws
- glue, stain
- wood filler
Tools
- Safety gloves, glasses
- Miter saw, jigsaw
- Chalk line, tape measure, spirit level, carpentry pencil
- Drill machinery and drill bits
Tips
- Apply several coats of wood stain to the wooden components
- Fill the holes with wood filler and smooth the surface
Time
- One Day
Related
How to build a crib
Building the wall frame
The first step of the woodworking project is to build the front face of the baby crib. As you can notice in the plans, we recommend you to assemble the frame of the front wall, using 1×4 lumber for the bottom slat, 1×3 lumber for rest of the frame. Drill pocket holes at both ends of the vertical supports and secure them to the top and bottom components using 1 1/4″ screws. Make sure the corners are square and the edges flush.

Building the front wall
Building the railings is a straight-forward process, so make sure you drill pocket holes at both ends of the vertical components, before securing them to the frame with 1 1/4″ screws. You can adjust the distance between the rails according to codes.

Building the side walls
Building the side walls is equally simple, but you need to adjust the size of the components before locking them into place tightly. Check if the corners are square, before inserting the galvanized screws.

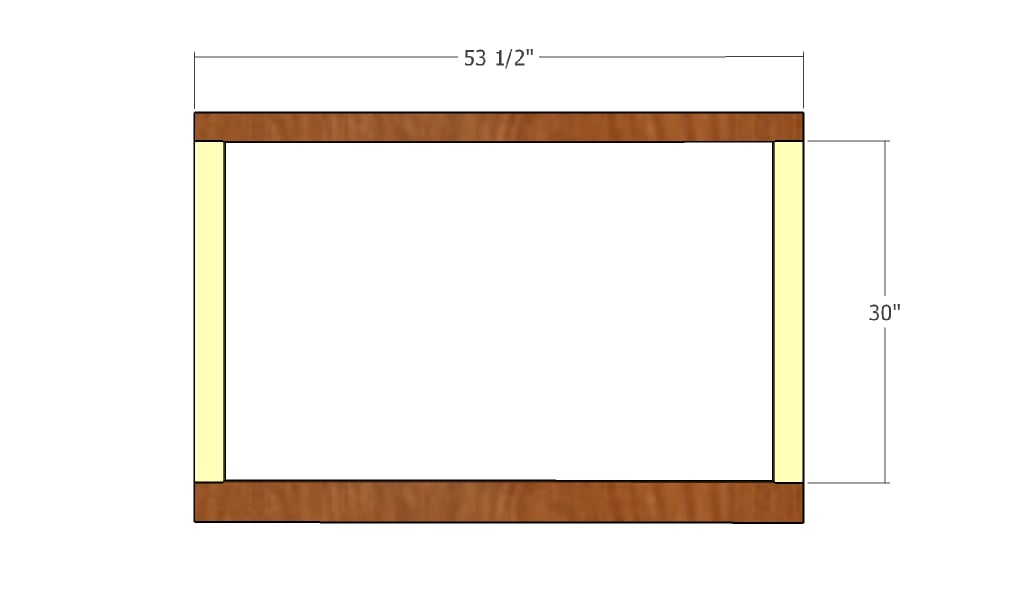
Building the back wall
Building the back wall of the baby crib is the next step of the woodworking project. Work with attention and make sure the wall is rigid. Align the components and check if the edges are flush, before inserting the screws. Use the woodworking techniques described above in order to get the job done.

Building the frame of the crib
Continue the woodworking project by locking the four walls of the crib together. Drill pocket holes along the sides of the front and back panels and insert 1 1/4″ screws into the adjacent walls. Make sure the corners are square before inserting the galvanized screws. Check if the edges are flush before driving the screws in.

Attaching the legs
Cut several pieces of 2×3 lumber and secure them to the bottom components of the frame. Drill pilot holes though the legs and secure them into place with 2″ screws. Add waterproof glue to the joints, in order to create a rigid structure.

Building the frame of the bed
Continue the baby crib project by making the bed frame. Use 1×3 slats to build the frame of the bed, making sure the corners are square. Next, attach the 1×1 cleats to the interior faces of the bed frame, in order to support the slats. Drill pocket holes though the cleats and secure them to the frame with 1 1/4″ screws.

Fitting the cleats
Next, secure the 1×3 slats to the cleats, as described in the diagram. Work with attention and place the slats equally-spaced, before locking them to the cleats with 1 1/4″ galvanized screws. You should decide the height at which you secure the bed frame to side walls. Use a spirit level to check if the bed frame is horizontal before inserting the screws through the frame into the walls.
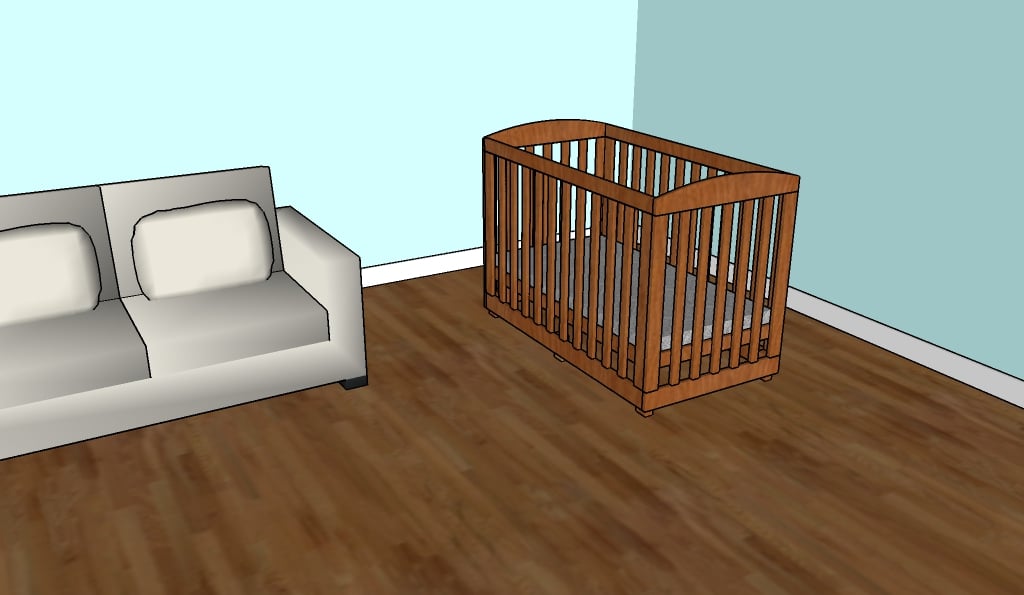
Crib plans
There are many designs you can choose from when building the wooden baby crib. Just make sure you choose the alternative that blends in the best with the rest of the room.

How to build a crib
Last but not least, we recommend you to take care of the finishing touches. Fill the holes with wood filler and let it to dry out for several hours. Afterwards, smooth the wooden surface with fine-grit sandpaper and vacuum the residues.
Thank you for reading our project about how to build a crib and we recommend you to check out the rest of the projects. Don’t forget to share our projects with your friends and LIKE us, by using the social media widgets, if you want to be the first that gets our latest articles.
6 comments
New legislation states that the space between the bars of the crib rail should be no more than 2-3/8 inches (6 centimeters) apart, so that babies can’t get their heads caught between them. The bars of cribs made prior to 1979 may have wider spacing that does not conform to these standards.
Thank you for the feedback. I always advise people to read the local building codes before starting a project.
refering to building a crib, for instance, you say 2 piecies of lumber 1x4x30, the board is cut at the lumber yard at 31/2 inches and called a 1×4 . so,is the 1×4 become a 1×3/2 used in the plane or do we rip to actual size?
The plans are designed using the actual size of lumber, for 1×4 is 3/4″ x 3 1/2″
I’m wanting to build a crib with the front panel that will slide up an down or hinge forward part of the way an down / and or both.. my question is there a hardware kit made for this available for a diy project? Thanks for any reply in advance.G.R.
Nice build and good looking too! Just was wondering what wood species you used for this build? What is the mattress dimensional height to the top of crib face? Did you go with a lower mattress mounting position too, if so what that dimension from the topn of the crib face? Thank you!