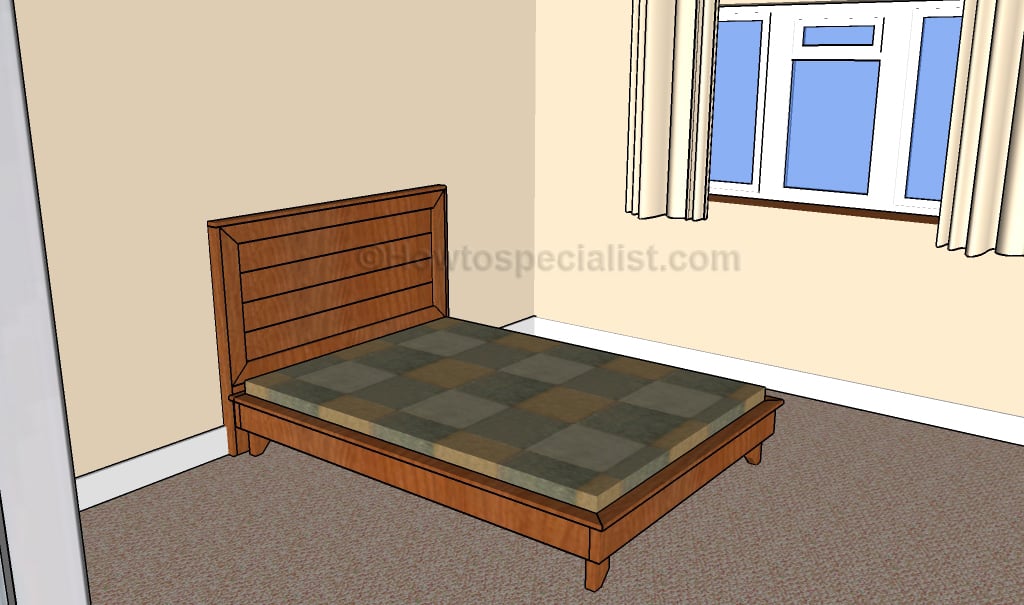
This step by step diy project is about full size platform bed frame plans. If you want to build a learn more about building a full size platform bed with a nice design, pay attention to this project. Follow the instructions and pay attention to the diagrams and build the wooden bed in just one weekend, even if you are a beginner when it comes to woodworking. Take a look over the rest of the project, to learn more about building the headboard.
You should always plan everything from the very beginning, in order to prevent costly mistakes and to save time. Taking into account the basic design, this bed frame can match the style of any home. Mark the cut lines on the slats before making the cuts and use a jigsaw to get the job done. If you are looking for other designs or sizes, you should check out the rest of the bed frame plans.
There are a few tips that you should take into account, if you want to get a professional result. Therefore, take accurate measurements and use professional tool when making the cuts or when drilling pilot holes. Align the components at both ends and add waterproof glue to the joints, if you want to create a rigid structure. Round the exposed edges with sandpaper or by using a good router. See all my Premium Plans in the Shop.
Made from this plan
Full size platform bed frame plans

Building a full size platform bed frame
Materials
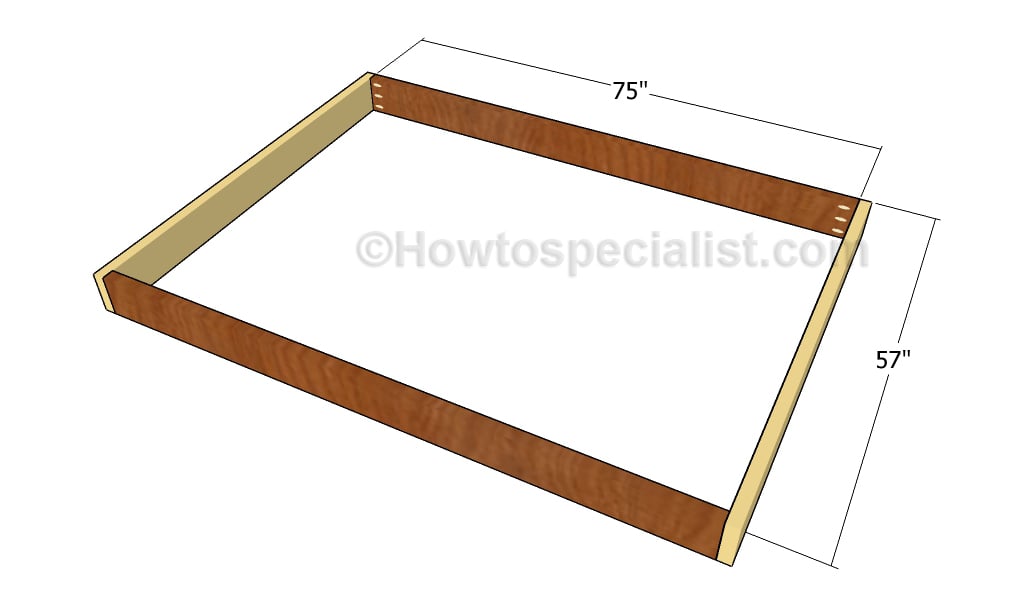
- A – 2 pieces of 2×6 lumber – 57″ long, 2 pieces – 75″ long FRAME
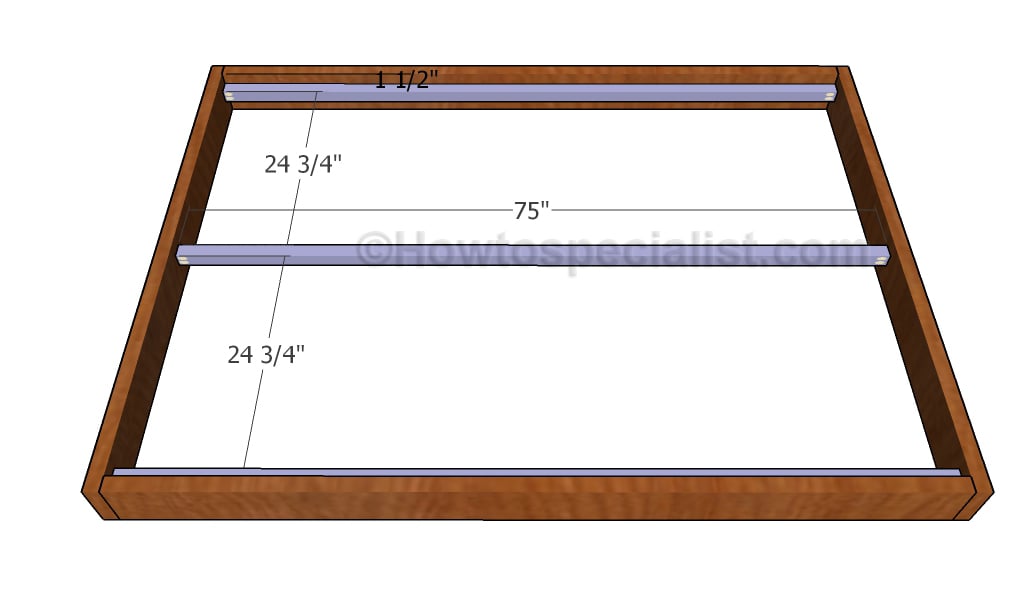
- B – 3 pieces of 2×2 lumber – 75″ long CLEATS
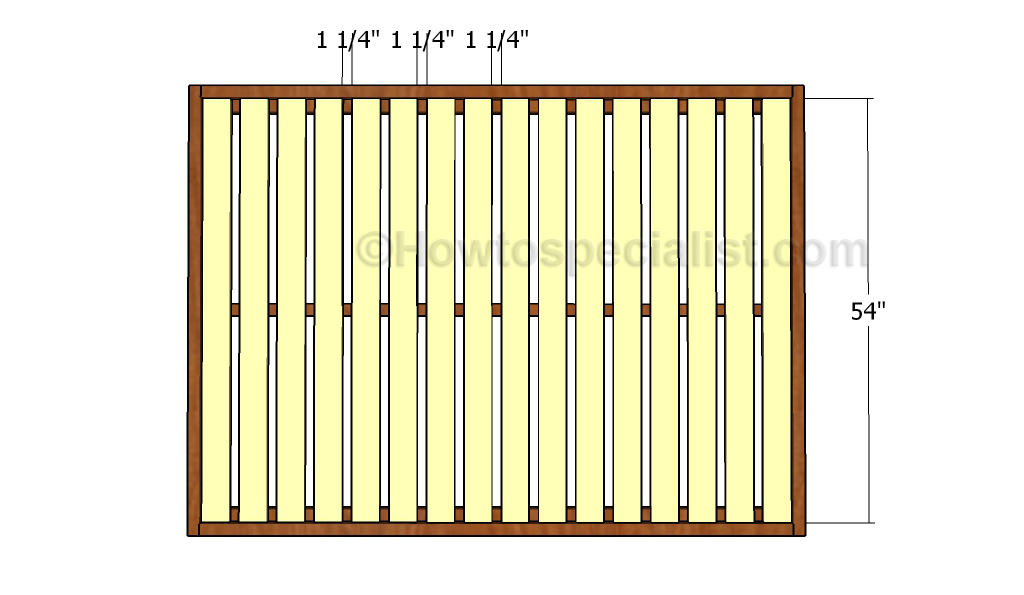
- C – 16 pieces of 1×4 lumber – 54″ long SUPPORT SLATS
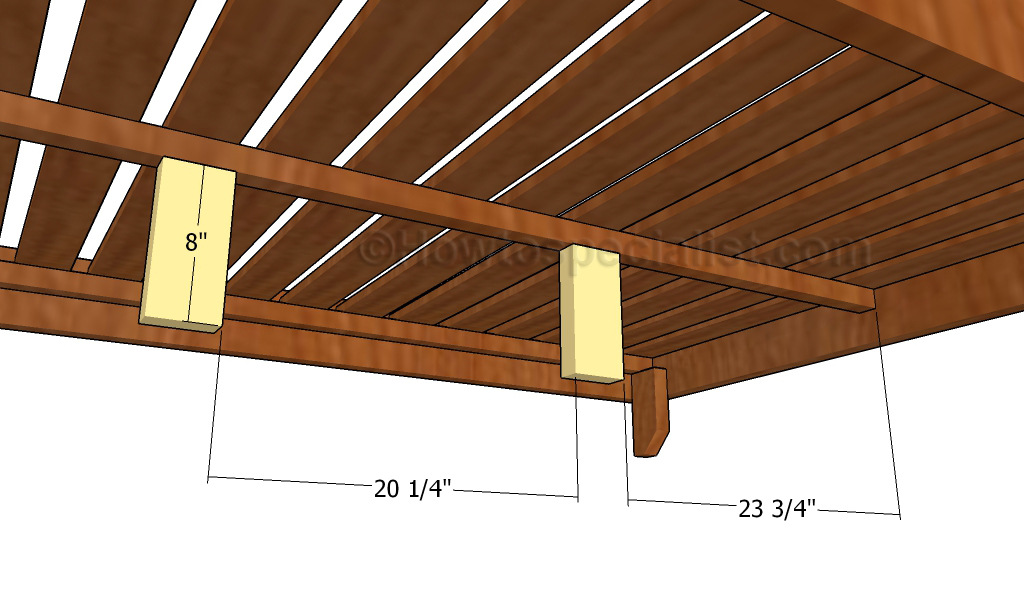
- D – 6 piece of 2×4 lumber – 8″ long LEGS
- E – 2 piece of 1×3 lumber – 77 1/2″ long, 1 piece – 59″ long, 1 piece of 1×2 lumber – 59″ long TRIMS
- 2 pieces of 2×6 lumber – 12 ft
- 3 pieces of 2×2 lumber – 8 ft
- 8 pieces of 1×4 lumber – 10 ft
- 1 piece of 2×4 lumber – 4 ft
- 3 pieces of 1×3 lumber 8 ft
- 1 piece of 1×2 lumber – 8 ft
- mattress
- 2 1/2″ screws
- 1 1/4″ screws
- glue
- stain
Tools
- Safety gloves, glasses
- Miter saw, jigsaw
- Chalk line, tape measure, spirit level, carpentry pencil
- Drill machinery and drill bits
Tips
- Use a good miter saw to make the angle cuts
- Drill pilot holes before inserting the screws
Time
- One Week
Related
- Part 1: Full size bed platform bed plans
- Part 2: Full size headboard plans
How to build a full size platform bed
Building the frame of the bed
The first step of the woodworking project is to build the frame of the full size bed. As you can notice in the diagram, build the components out of 2×6 lumber. Smooth the cut edges and drill pocket holes at both ends of the side components. Align the edges and insert a few 2 1/2″ screws to create rigid joints. Add glue to the joints and remove the excess.
Fitting the cleats
The next step of the woodworking project is to fit the 2×2 cleats to the bed frame. As you can easily notice in the diagram, we recommend you to drill pocket holes at both ends and to secure them to the frame using 2 1/2″ screws. Use a spirit level to make sure the cleats are perfectly horizontal.
Attaching the supports slats
Continue the project by fitting the 1×4 support slats to the cleats, in order to create a level surface. Place the slats equally-spaced, making sure you leave 1 1/4″ between them. Drill pilot holes and insert 1 1/4″ screws into the cleats.

Fitting the corner legs
Build the corner legs for the bed frame out of 2×4 lumber. Cut the leg in a decorative manner and drill pilot holes. Align the component with attention and insert 2 1/2″ screws into the bed frame, in order to create rigid joints.
Fitting the middle supports
Fit 2×4 legs under the middle cleat, in order to support the weight properly and to add rigidity to the bed frame. Drill pocket holes along the top edge of the supports and insert 2 1/2″ screws into the cleats.

Attaching the trims
In order to enhance the look of the platform bed frame, we recommend you to attach trims to the bed frame. Use 1×2 lumber for the top trim and 1×3 lumber for the rest of the trims. Cut the ends of the trims at 45 degrees. Align the trims with great care and lock them into place using 1 1/4″ nails. Add glue to the joints and leave no gaps between the components.
Full size platform bed frame plans
Last but not least, we recommend you to take care of the finishing touches. In order to get a professional result, fill the holes and the gaps with wood filler and let it dry out for a few hours. Check if there are protruding screws and fix this issue, if necessary.
Thank you for reading our project about full size platform bed frame plans and we recommend you to check out the rest of the projects. Don’t forget to SHARE and LIKE our projects with your friends, by using the social media widgets, if you want to help us keep adding free woodworking plans.
<< Previous | Next >>
1 comment
The 1x4s you have listed are not enough for 16 slats. You need 8 of them, not 4. Unless I did something wrong.