

This step by step woodworking project is about 12×14 picnic shelter plans. If you want to build a simple pavilion for your backyard, we recommend you to take a look over this project. Before starting the construction, you need to find out the legal requirements regarding this type of constructions. Follow the building codes and hire a professional contractor if you don’t have the right skills to undertake the project on your own.
A 12×14 wooden shelter for your backyard is a construction that can be built by any woodworking amateur in a few weeks, but there are many techniques you have to master before undertaking the project. However, building a gazebo, a pergola or even a backyard kitchen with an attached roof could be projects that are more suitable for your needs. It’s you job to decide what design does best for you.
We recommend you to invest in the best materials you could afford. Therefore, you should buy weather-resistant lumber, such as pressure-treated lumber, pine or cedar. Always take accurate measurements before adjusting the size of the components at the proper size. Drill pilot holes trough the components before inserting the wood screws, to prevent the wood from splitting. See all my Premium Plans in the Shop.
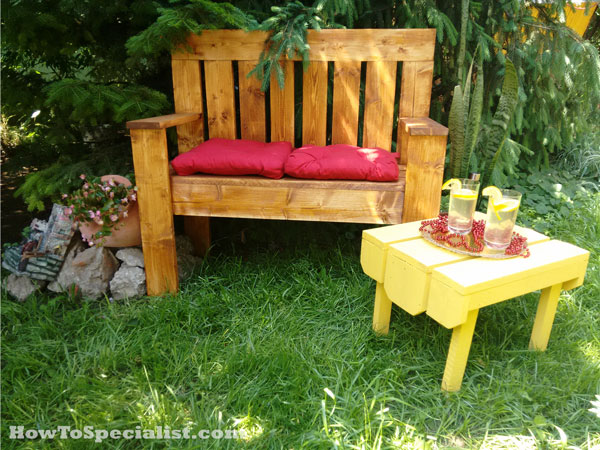
Made from this plan

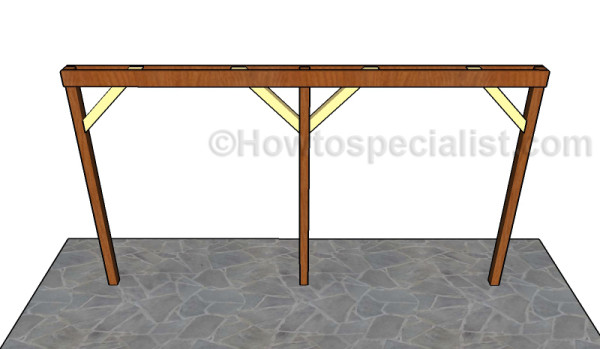
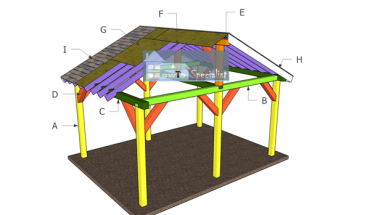
Building a large picnic shelter
Materials
- A – 4 pieces of 4×4 lumber – 132″ long (36″ in the ground) POSTS
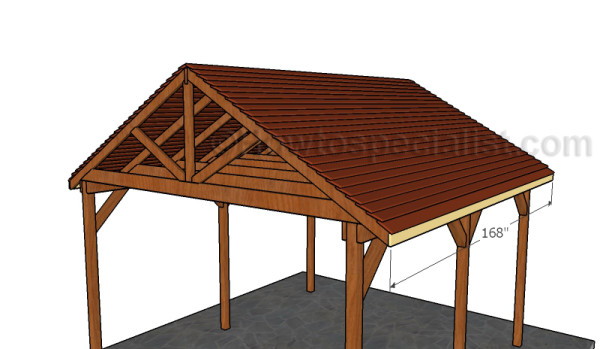
- B – 4 pieces of 2×6 – 168″ long SUPPORT BEAMS
- C – 8 pieces of 4×4 – 34″ long BRACES
- D – 2 pieces of 2×4 – 37″ long, 1 piece of 2×6 lumber – 168″ long TOP RIDGE
- E – 8 pieces of 2×4 lumber – 147″ long BOTTOM RAFTERS
- E – 16 pieces of 2×4 lumber – 96″ long RAFTERS
- F – 2 pieces of 1×4 lumber – 168″ long TRIMS
- G – 50 pieces of 1×6 lumber – 168″ long ROOFING
- H – 4 pieces of 2×4 lumber – 38″ long TRIMS
- 6 pieces of 4×4 lumber – 12 ft
- 5 pieces of 2×6 lumber – 14 ft
- 17 pieces of 2×4 lumber – 8 ft
- 9 pieces of 2×4 lumber – 14 ft
- 2 pieces of 1×4 lumber – 14 ft
- 50 pieces of 1×6 lumber – 14 ft
- post anchor (optional)
- tube forms
- rafter ties, 1 1/2″ structural screws
- 7″ carriage bolts
- post to beam connectors
- 2 1/2″ screws, 1 5/8″ screws
- stain, glue, putty
- 2 1/2″ screws
Tools
- Safety gloves, glasses
- Miter saw, jigsaw
- Chalk line, tape measure, spirit level, carpentry pencil
- Drill machinery and drill bits
Tips
- Add trims to the pavilion
- Secure the roofing slats to the structure with galvanized screws
Time
- One Week
Related
Building an outdoor pavilion
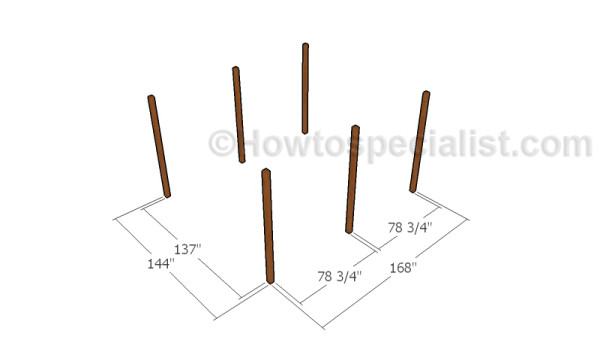
Laying out the posts
First of all, you need to lay out the picnic shelter. As you can easily notice in the diagram, we recommend you to use batter boards and string to lay out the posts. Measure the diagonals and make adjustments until they are perfectly equal. Apply the 3-4-5 rule to every corner to make sure they are right-angled.
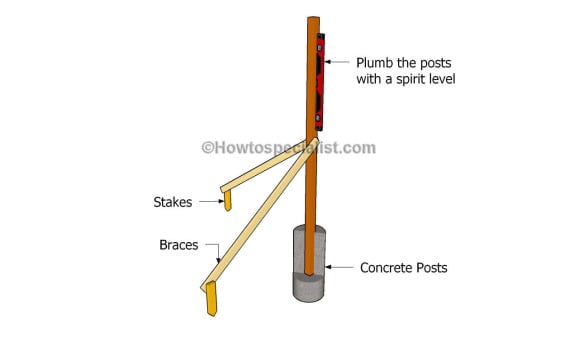
Fitting the posts
The next step of the project is to fit the posts into place. First of all, you need to dig 2-3′ deep holes (at least 6″ under the frost line) and pour a 2″ layer of gravel. Install tube forms and fit the posts into place, making sure they are perfectly plumb. Secure the 4×4 posts with braces before filling the forms with concrete.
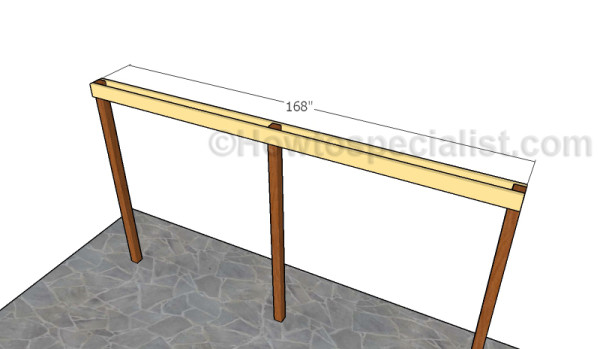
Attaching the support braces
Afterwards, you need to install the support beams to the top of the posts, on both sides of the picnic shelter. Use 2×6 lumber. Clamp the beams to the posts and use a spirit level to check if the beams are horizontal. In addition, use a carpentry square to check if all the corners are right-angled. Drill pilot holes through the beams and through the posts. Insert 7″ carriage bolts and lock the components together tightly.
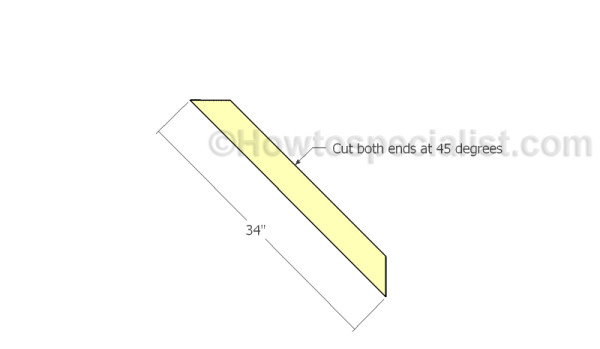
Build the braces
Build the braces from 4×4 lumber. Cut both ends of the braces at 45 degrees and smooth the edges with sandpaper.
Attaching the braces
Fit the braces into place and lock them to the components with 2 1/2″ screws.
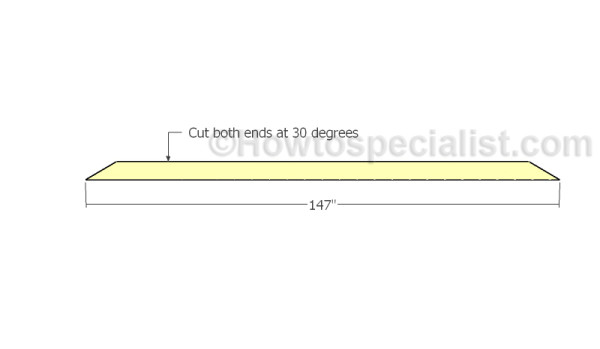
Building the bottom rafters
Build the bottom rafters from 2×6 lumber. Cut both ends of the rafters at 30 degrees (set the miter saw at 60 degrees).

Attaching the bottom rafters
Place the support rafters equally-spaced and leave no gaps between the components. Use metal connectors to lock the rafters to the support beams.
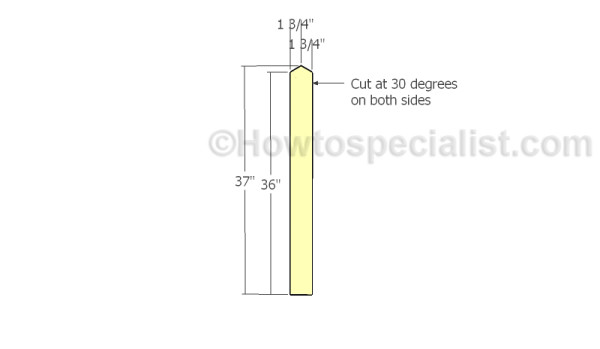
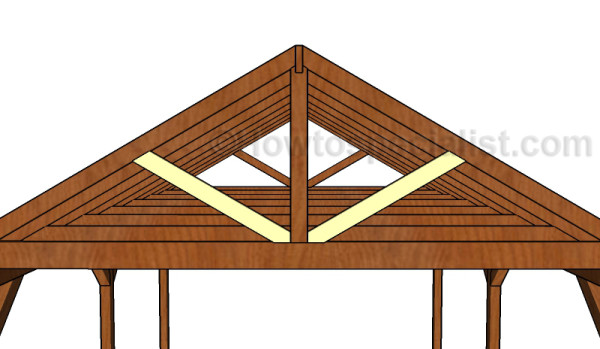
Build the ridge supports
In order to enhance the rigidity of the picnic shelter, we recommend you to fit 2×4 supports to both the front and the back of the shelter. Mark the cut lines to the slats and get the job done with a saw. Smooth the edges with fine-grit sandpaper and remove the residues with a damp cloth.
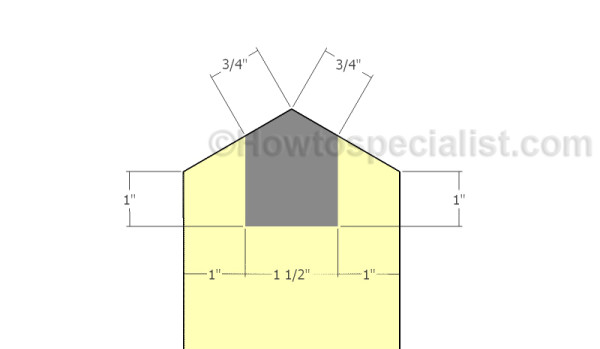
Cutting the top of the supports
Make a notch to the top of the supports using the pattern shown in the diagram.
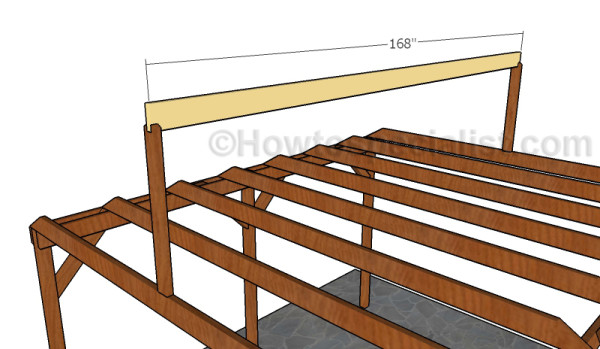
Fitting the top ridge
Fit the supports to the end bottom rafters. Make sure the corners are square and plumb the support with a spirit level. Align the edges with attention and use metal connectors to lock the supports into place. Attach the 2×6 top ridge to the supports. Make sure the corners are square.
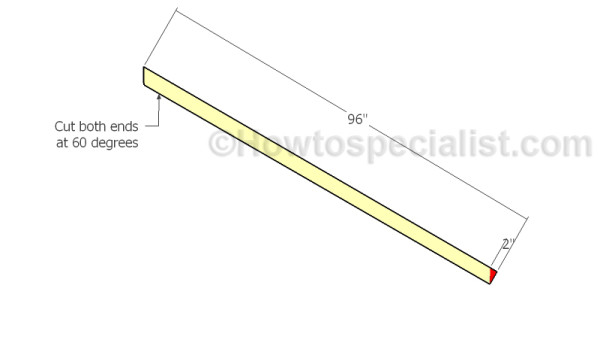
Building the rafters
Next, you need to build the rafters for the shelter. Cut both ends of the slats at 60 degrees (set the miter saw at 30 degrees).
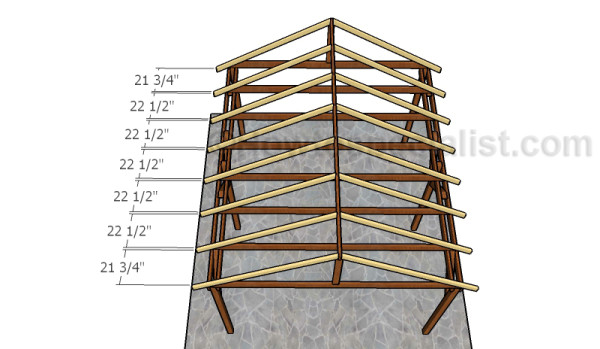
Fitting the rafters
Place the rafters to the support beams, making sure you place them equally-spaced. Use metal connectors to secure the rafters to the support beams and 3 1/2″ screws to lock the opposite end to the top ridge. Drill pilot holes before inserting the screws, to prevent the wood from splitting.
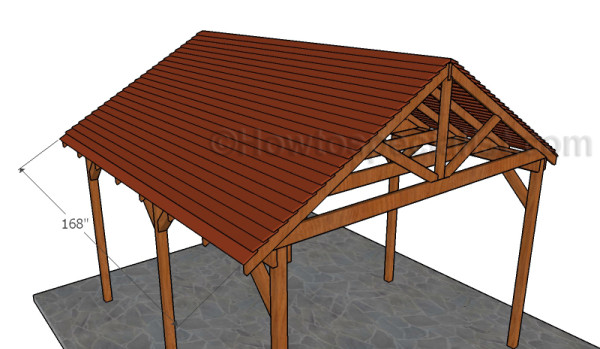
Fitting the roofing slats
There are several alternatives to choose from when building the roofing for the outdoor shelter. Therefore, you could use 1×6 slats or lay plywood and metal sheets or asphalt shingles. If you are going to install 1×6 slats to the roof structure, you need to start from the bottom. Align everything with great care and secure the components into place using galvanized screws or nails. Fit the rest of the slats making sure they overlap at least 1 1/2″. Make sure the top cap will protect the structure from water damage.
Fitting the side trims
Fit a piece of 1×4 lumber to ends of the rafters, on both sides of the picnic shelter, in order to enhance its look. Align the trims with great care, making sure the edges are perfectly flush one with another and secure them into place using 1 1/4″ finishing nails.
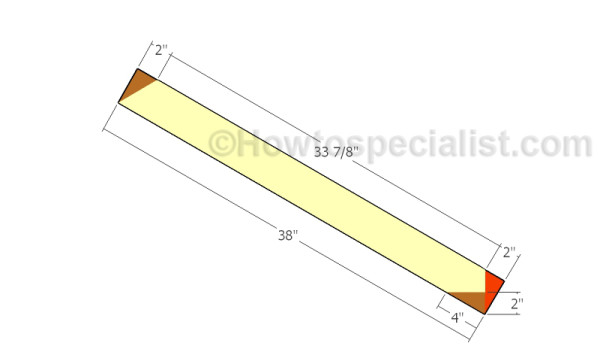
Building the end trims
Build some decorative trims for the front and back gable ends of the shelter. Use a good saw to make cuts to the 2×4 slats.
Attaching the gable ends trims
Fit the trims into place, as described in the diagram, drill pilot holes and lock them to the rafters using 2 1/2″ screws.

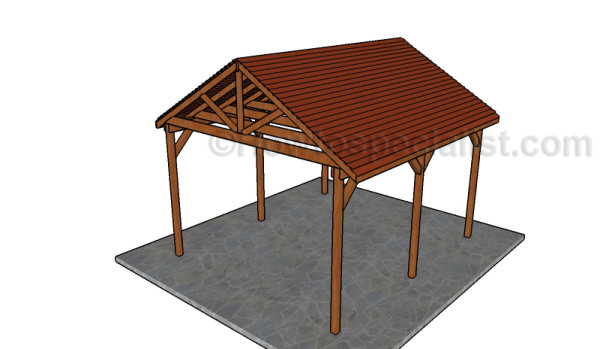
DIY Picnic Shelter
Last but not least, we recommend you to take care of the finishing touches. In order to get a professional result, fill the holes and the gaps with wood filler and let it dry out for a few hours. Check if there are protruding screws and fix this issue, if necessary.
12×14 Picnic Shelter Plans
If you want to download the plans. just click on the GET PDF PLANS button bellow.

Thank you for reading our project about 12×14 picnic shelter plans and we recommend you to check out the rest of the projects. Don’t forget to LIKE and SHARE our projects with your friends, by using the social media widgets. SUBSCRIBE to be the first that gets our latest projects.
