

This step by step woodworking project is about free picnic table plans. If you have a large family or lots of friends, building this long picnic table is THE ONE project you should pay attention to. In addition, it has handicap accessibility on both ends of the table. I got you covered with all the information you need to know, starting with plans, a cut list and lots of tips. So what are you waiting for?
We recommend you to invest in the best materials you could afford. Therefore, you should buy quality lumber, such as pine. Always take accurate measurements before adjusting the size of the components at the proper size. Drill pilot holes trough the components before inserting the wood screws, to prevent the wood from splitting. See all my Premium Plans in the Shop.
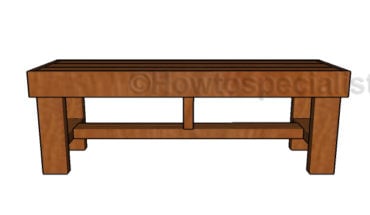
Made from this plan

Materials
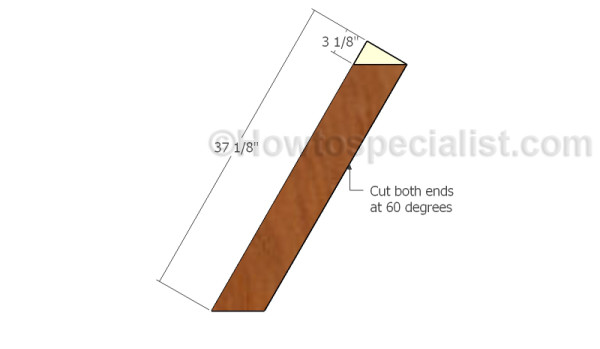
- A – 6 pieces of 2×6 lumber – 37 1/8″ long LEGS
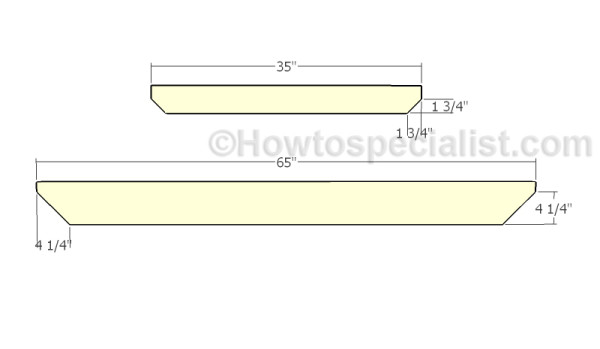
- B – 4 piece of 2×6 lumber – 65″ long, 6 pieces of 2×4 lumber – 35″ long SUPPORTS
- C – 4 piece of 2×6 lumber – 144″ long BENCHES
- D – 6 pieces of 2×6 lumber – 144″ long TABLETOP
- E – 4 pieces of 2×4 lumber – 28 1/4″ long DIAGONAL BRACES
- 14 pieces of 2×6 lumber – 12′
- 5 pieces of 2×4 lumber – 6′
- 16 pieces of 3 1/2″ carriage bolts
- 8 pieces of 6″ carriage bolts
- 50 pieces of 4 1/2″ screws
- 300 pieces of 2 1/2″ screws
- wood glue, stain
Tools
- Safety gloves, glasses
- Miter saw, jigsaw
- Chalk line, tape measure, spirit level, carpentry pencil
- Drill machinery and drill bits
Time
- One Weekend
12 Foot Picnic Table Plans
Building the legs
The first step of the project is to build the legs for the 12′ picnic table. As you can see in the diagram, you need to make 30 degree cuts to both ends of the 2×6 beams. Smooth the edges with sandpaper.
Building the braces
Next, you need to build the support beams for the picnic table. Use 2×4 lumber for the tabletop supports and 2×6 lumber for the benches supports. In addition, you should make 45 decorative cuts to both ends of the supports, if you want to enhance the look of your projects.

Building the frames
Lay the supports on a level surface, making sure they are parallel. The attach the legs, paying attention to the edges alignment. I cannot emphasize enough on the importance of this step, otherwise the top won’t be perfectly plane. Drill pilot holes through the legs and through the supports and insert 3 1/2″ carriage bolts. Two bolts for each joint will provide enough support, so you don’t have to overdo it.
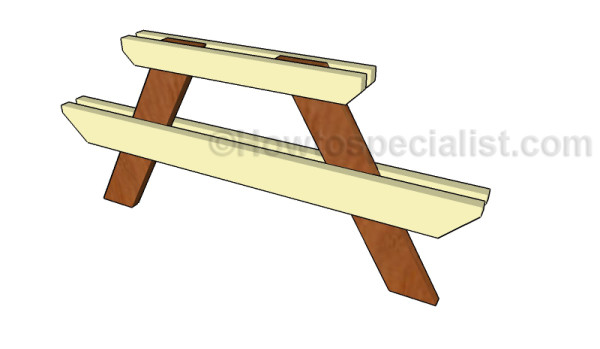
Middle support
Pay attention to the middle legs, as you need to attach supports on both sides, as shown in the plans. As you might image a 12 foot picnic table is pretty long, so you need the extra-braces to the middle legs, so that the whole structure is sturdy on the long term.
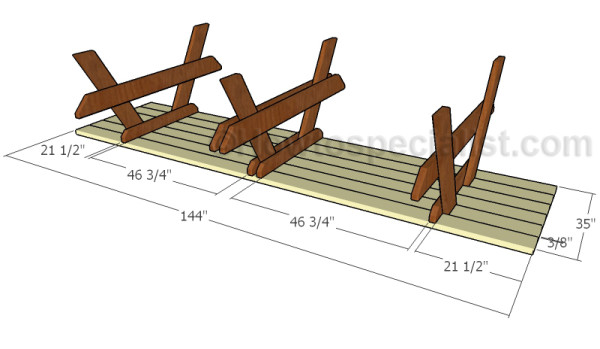
Fitting the tabletop slats
Lay the 2×6 slats for the tabletop on a level surface. Place pieces of 3/8″ plywood between the slats to create consistent gaps. Align both ends using a straight edge. Next, attach the frames to the slats, as shown in the free picnic table plans. Drill pilot holes through the 2×4 supports into each slat. Next, insert 4 1/2″ screws to secure the supports tightly into place.
As you can notice, I left overhangs at both ends of the table. It is more than a mere design trick, it is a handicap accessibility feature.
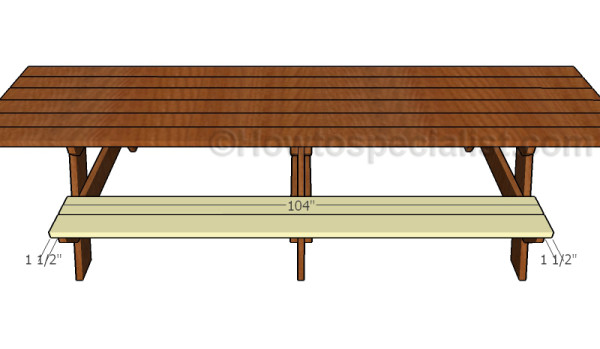
Fitting the bench slats
Attach the 2×6 slats to the bench supports. Drill pilot holes through the slats and insert 2 1/2″ galvanized screws into the supports. Use 3 screws for each joint. Countersink the head of the screws, so that they are just under the surface.
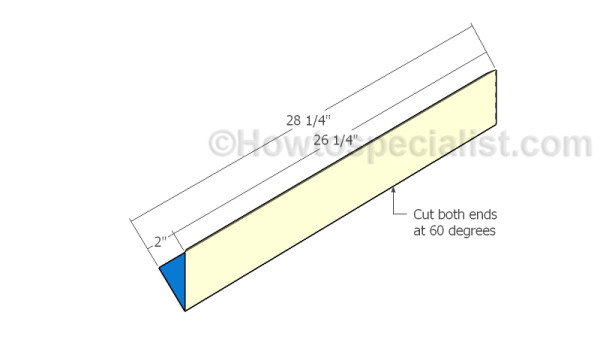
Building the diagonal braces
If you really want to get serious with this bench and build it like a pro, you have to add strength to the frame by adding diagonal braces. Cut both ends of the 2×4 braces at 60 degrees.
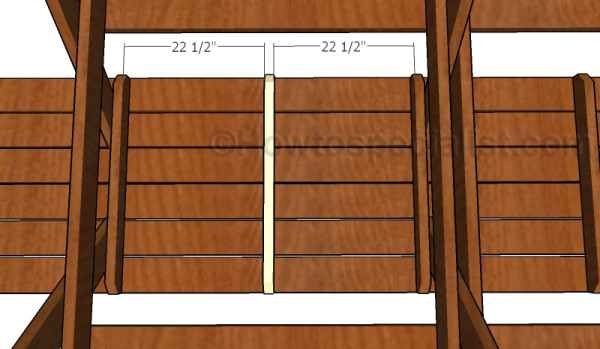
Fitting the tabletop supports
But before fitting the diagonal braces, you need to install 2×4 supports to the tabletop, as shown in the diagram. Drill pilot holes and insert 4 1/2″ screws into the slats.
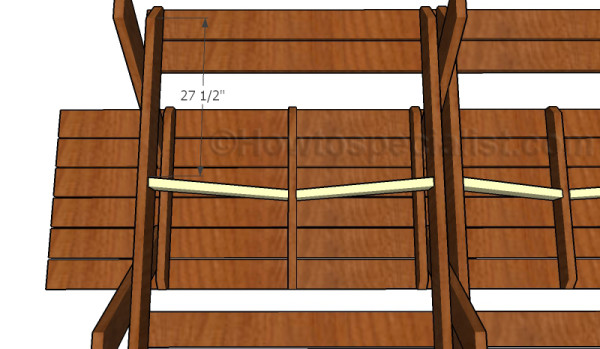
Fitting the diagonal braces
Now, you can add the diagonal braces to the frame of the 12 foot picnic table. Drill pilot holes at both ends of the braces and secure them to the supports using 2 1/2″ screws. Use a spirit level to make sure the legs are plumb before installing the diagonal braces.
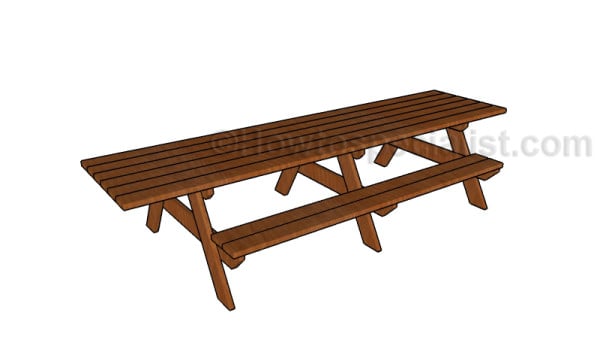
12 foot picnic table plans
After assembling the picnic table, all you are left to do is take care of the finishing touches. Therefore, fill the holes with wood putty and smooth the surface with sandpaper. Use a router and a round bit to round the exposed edges, if you aim for an unique look. Otherwise, you can just sand them thoroughly.
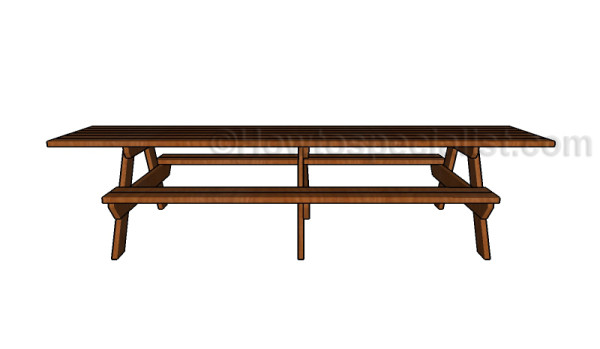
12′ picnic table plans
Thank you for reading our project about free 12′ picnic table plans and we recommend you to check out the rest of the projects. Don’t forget to LIKE and SHARE our projects with your friends, by using the social media widgets. SUBSCRIBE to be the first that gets our latest projects.

Hi, I am looking for a traditional picnic table plan
For a 84″x 40″ redwood table
Thanks George
You can see all my picnic table plans here: http://howtospecialist.com/category/picnic-table/
Used these plans table came out prefect the only problem was you need 14 12ft 2×6 the list above said you only need 12 but you for sure need 14 took a day to do I’m very happy with it
Thank you for the feedback and congrats for the project. I’ll modify the materials list. I would be grateful if you send a few pics with the project, so I can feature it on the site. This would also help other DIY-ers.