
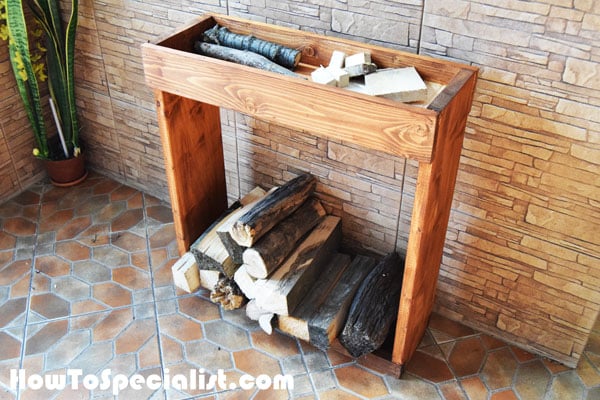
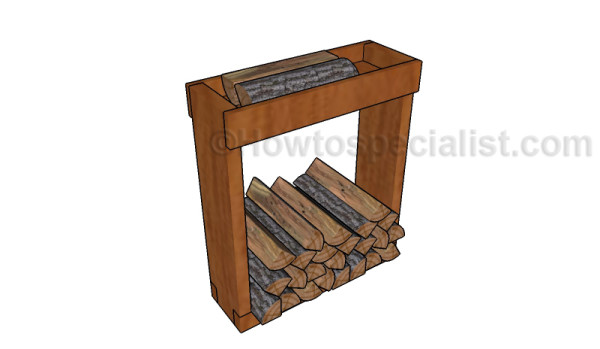
This step by step woodworking project is about how to build an indoor firewood rack. Even if winter is almost over, I still like to use my fireplace from time to time. I always had trouble storing the firewood, so I decided to build a simple and rustic rack made from lumber. I designed this project having in mind my own needs, so feel free to adjust the plans to suit your needs. I added a top tray to the rack, so that you can sort the firewood and separate the twigs from the logs. In this manner, you can save a lot of time when lighting the fire, as you have everything at one place.
We recommend you to invest in the best materials you could afford. Therefore, you should buy weather-resistant lumber, such as pine or cedar. Always take accurate measurements before adjusting the size of the components at the proper size. Drill pilot holes trough the components before inserting the wood screws, to prevent the wood from splitting. There are even concrete log holders out there, but I personally like to show you how to build a wood fireplace log holder. See all my Premium Plans in the Shop.
Made from this plan
Building a firewood rack for indoor
Materials
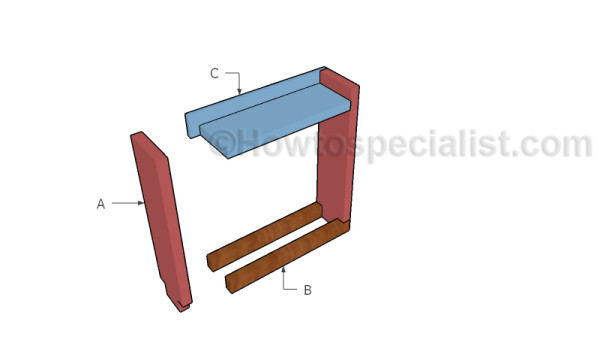
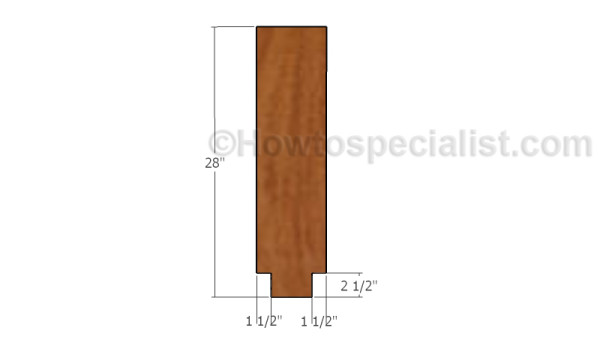
- A – 2 pieces of 2×8 lumber – 28″ long SIDES
- B – 2 piece of 2×3 lumber – 24″ long BOTTOM
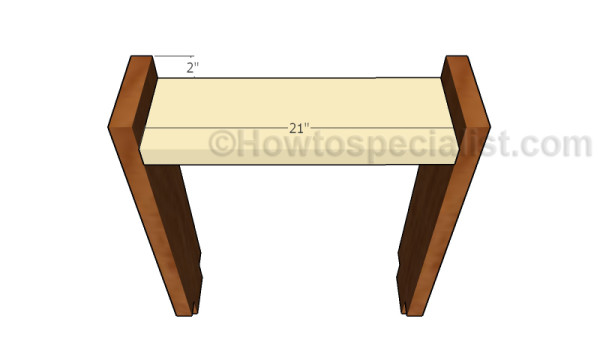
- C – 1 piece of 3×8 lumber – 21″ long, 2 pieces of 1×4 lumber – 24″ long TRAY
- 1 piece of 2×8 lumber – 8′
- 1 piece of 2×3 lumber – 4′
- 1 piece of 1×4 lumber – 4′
- 15 pieces of 2 1/2″ screws
- 20 pieces of 2″ brad nails
- stain, glue
Tools
- Safety gloves, glasses
- Miter saw, jigsaw
- Chalk line, tape measure, spirit level, carpentry pencil
- Drill machinery and drill bits
Time
- One Weekend
Indoor firewood rack – Fireplace log holder plans
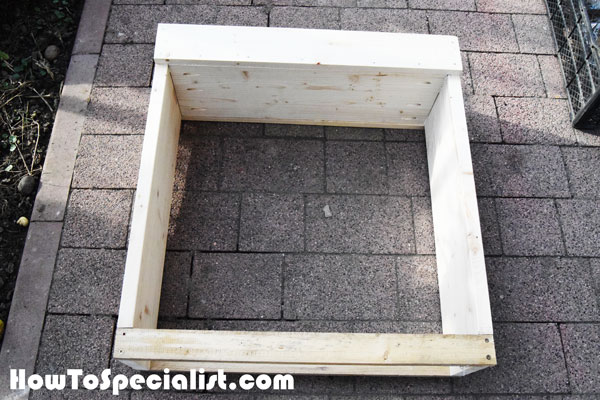
Building the sides
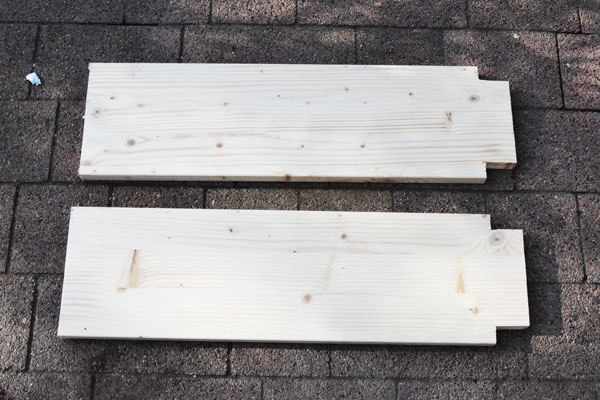
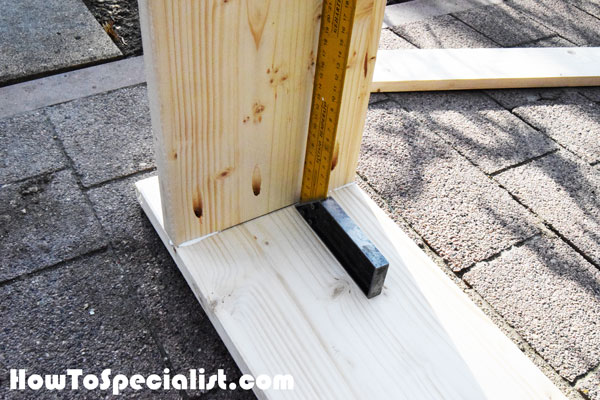
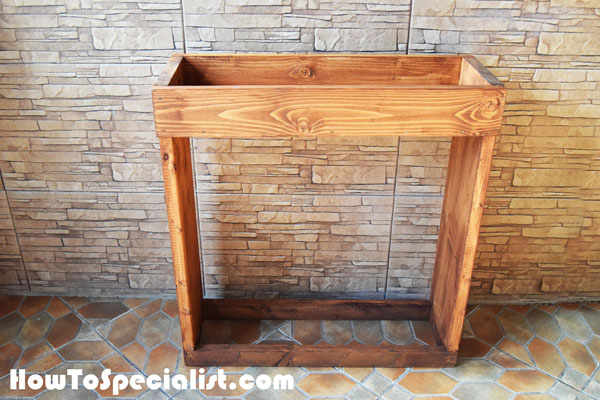
Build the sides for the firewood rack from 2×8 lumber. As you can see you need to make notches to the bottom of the side components.
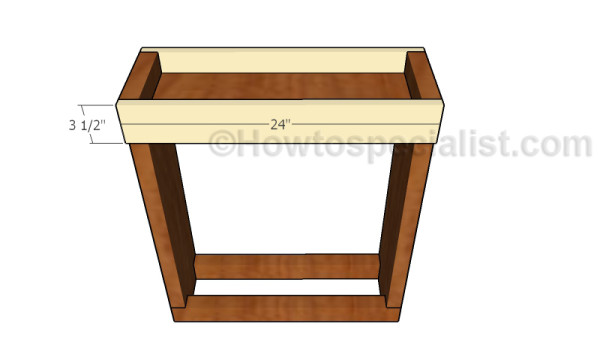
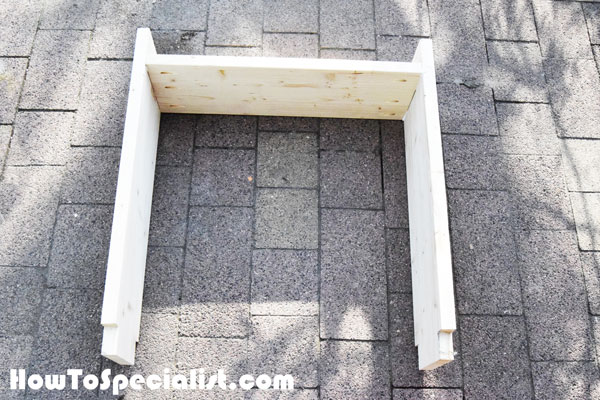
Assembling the firewood rack frame
Next, you need to attach the bottom of the tray to the sides. Drill pocket holes at both ends and secure it to the sides with 2 1/2″ screws. Make sure the corners are square before inserting the screws.
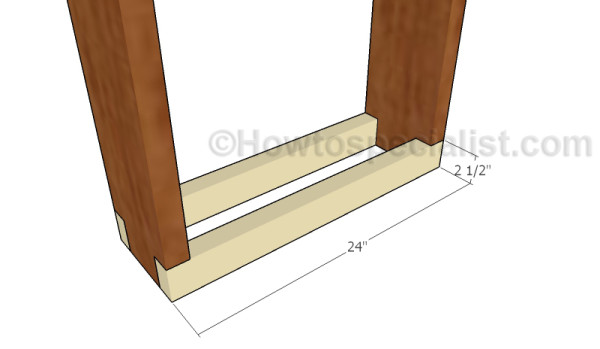
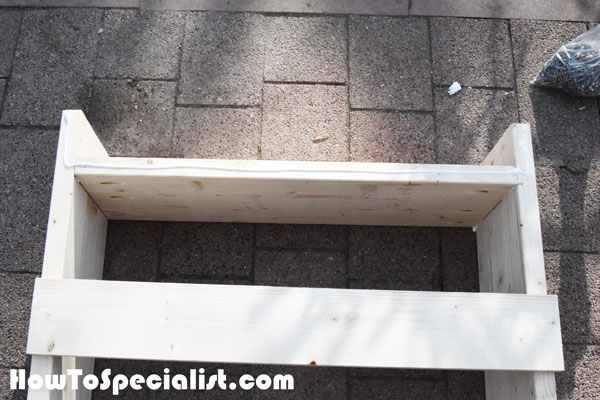
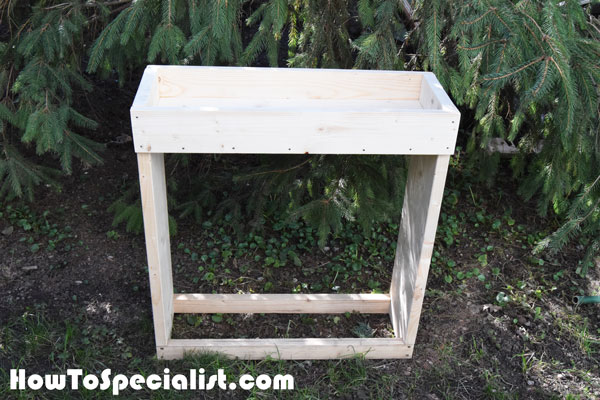
Attaching the bottom supports
Fit the 2×3 supports to the bottom notches, as shown in the diagram. Make sure the edges are flush and check if the corners are square.
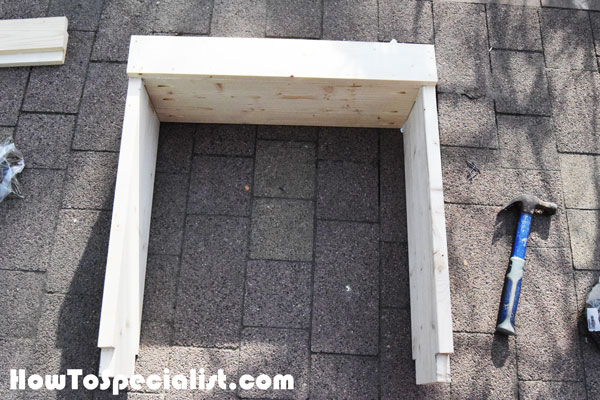
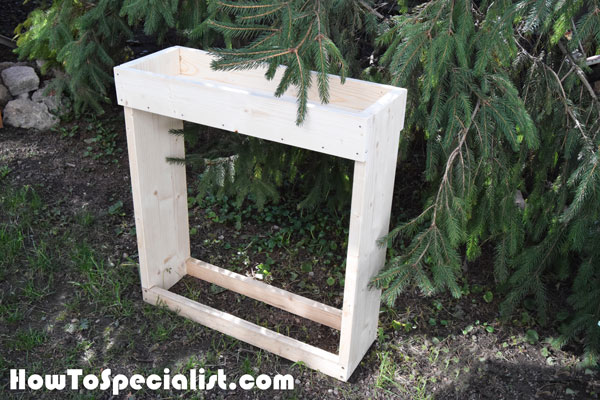
Attaching the top sides
Last but not least, attach the 1×4 slats to the top of the firewood rack to create the tray. Align the edges with attention and leave no gaps between the components for a neat result. Smooth the edges with sandpaper thoroughly. Do not overlook this step as it is essential to smooth the surface before applying the stain.
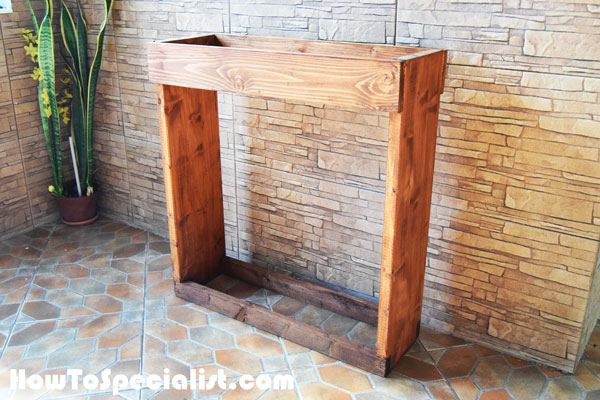
Indoor Firewood Rack Plans
Take care of the finishing touches before filling the rack with firewood. Apply a few coat of stain to enhance the look of the wood frame.
How to build an indoor firewood rack
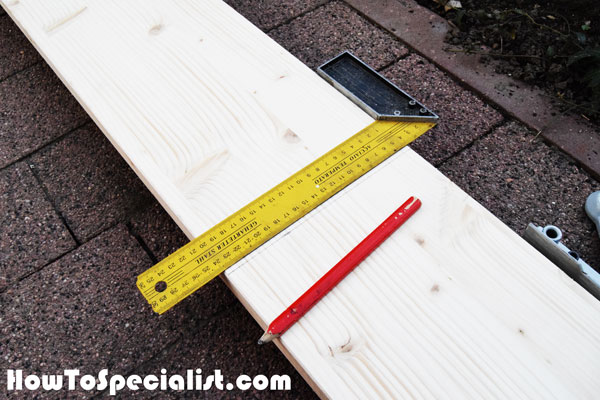
The first step of the project is to cut the components for the frame of the indoor firewood rack. Mark the lines on the 2×8 beam with a pencil and using a carpentry square. In this manner, you will make sure the corners are square and have no problems when assembling the components.
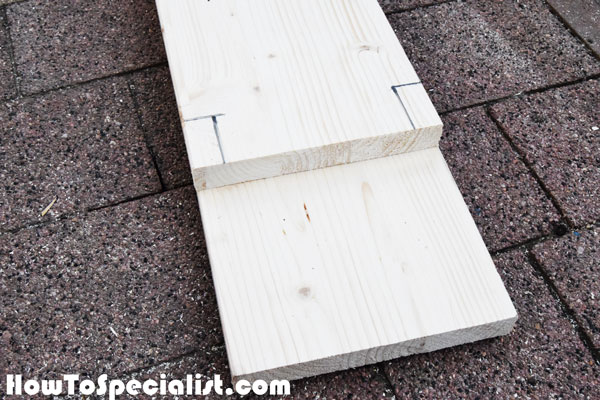
Next, you need to mark the cut lines to the side slats before making the bottom notches. Use a saw to make the cuts along the cut lines. I clamped the beam to the workbench and made the cuts. I then used sandpaper to smooth the recesses.
The two sides should be perfectly identical, otherwise the wood storage rack won’t have a symmetrical look. Now it’s time to push the gas pedal and speed up the project.
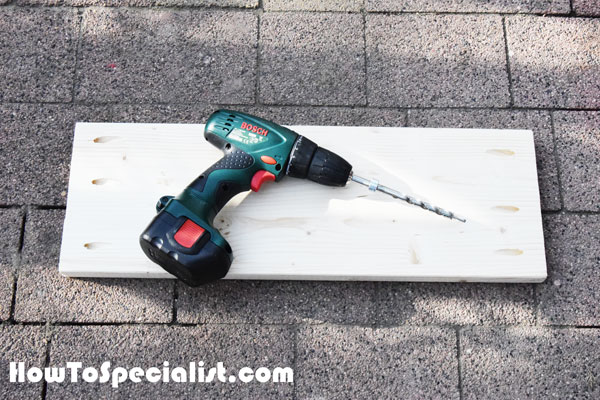
I drilled three pocket holes along the side edges of the beam that will be the bottom of the tray. Make sure you leave about 1″ from the edges and try as much as possible to make the pocket holes equally-spaced.
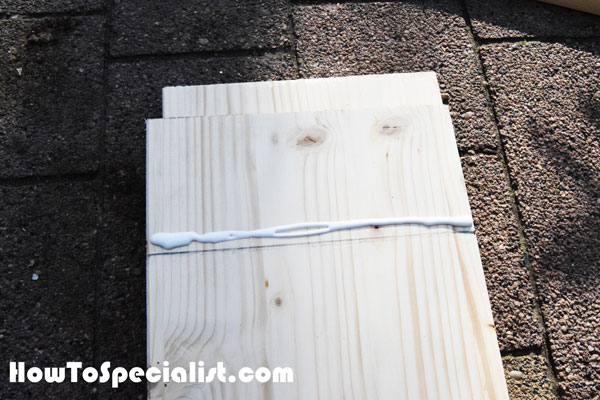
Mark the line for the bottom edge of the horizontal slat, using a square and a pencil. Then add waterproof glue above the glue, as shown in the diagram.
Use a carpentry square when joining the boards together. In addition, align the edges until they are perfectly flush. Using the square is essential, otherwise you can’t be sure the corners will be right-angled. I used 2 1/2″ screws to join the boards and I can say the pocket joints are really strong.
Make sure you remove the excess glue before it dries out, using a damp cloth. After it dries it will be more difficult to clean it off.
Attach the other side to the frame in the same manner described above. It is a good idea to have someone help you while aligning the edges and inserting the screws, otherwise it might be a little tricky to join everything together accurately.
Next, I added glue to the sides of the frame, so that I can attach the 1×4 and make the tray.
I used 2″ brad nails to secure the slats to the frame of the firewood rack. If you don’t think the brad nails are enough to create a strong joint between the components, you should insert a few 1 1/4″ galvanized screws after drilling pilot holes.
Fit the 2×3 slats to the bottom of the structure. Align the edges with attention and make sure the corners are square. Drill pilot holes at both ends of the supports and insert 2 1/2″ screws into the side components. I also added waterproof glue to the joints.
After building the indoor firewood shed, I used 120-220 grit sandpaper to smooth the edges and to even out the surface. Make sure you don’t skip this step even though it’s boring work.
I personally like the simple shape of the firewood rack and I am thrilled that it only took me 2 hours to build it. After removing the dust from the slats I applied a few coats of stain to enhance the look of the project and to protect it on the long run.
I used teak stain and let it dry out for about 12 hours. It was a surprisingly sunny day, so the drying process was rather quick.
If you like straight lines and high functionality, this is the project you need to follow.
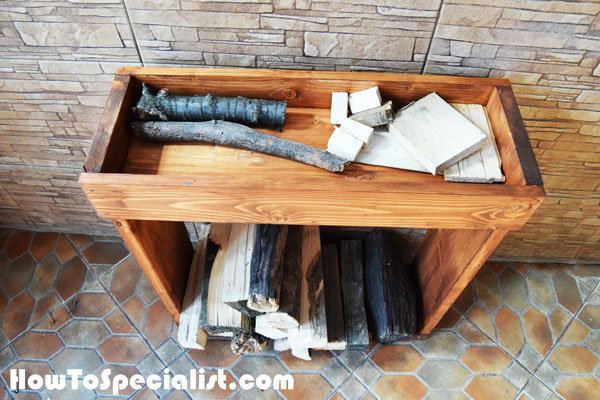
As you can see, the top shelf will be used to store the wood cut outs, paper and small twigs, all used for lighting the fire. The firewood will be stored to the bottom supports. I love this feature about the project, as it makes sorting the firewood extremely easy.
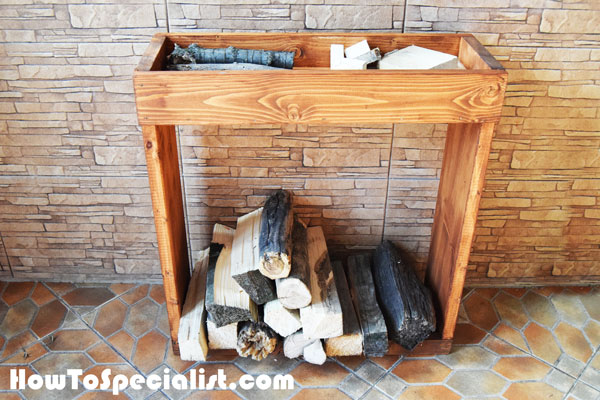
This log holder can be placed near your fireplace, on the hallway or in your garage. If you are a little careful when selecting the firewood, you can turn this rack in an attraction point of your home. It really pops out, as the rustic design cannot be overlooked.

All in all, I love this 15 $ project as it adds character to my home and not it is a lot easier to store the wood for the fireplace. In addition the top shelf ease my work, so now lighting the fire is so easy.
Thank you for reading our project about how to build an indoor firewood rack and we recommend you to check out the rest of the projects. Don’t forget to LIKE and SHARE our projects with your friends, by using the social media widgets. SUBSCRIBE to be the first that gets our latest projects.